
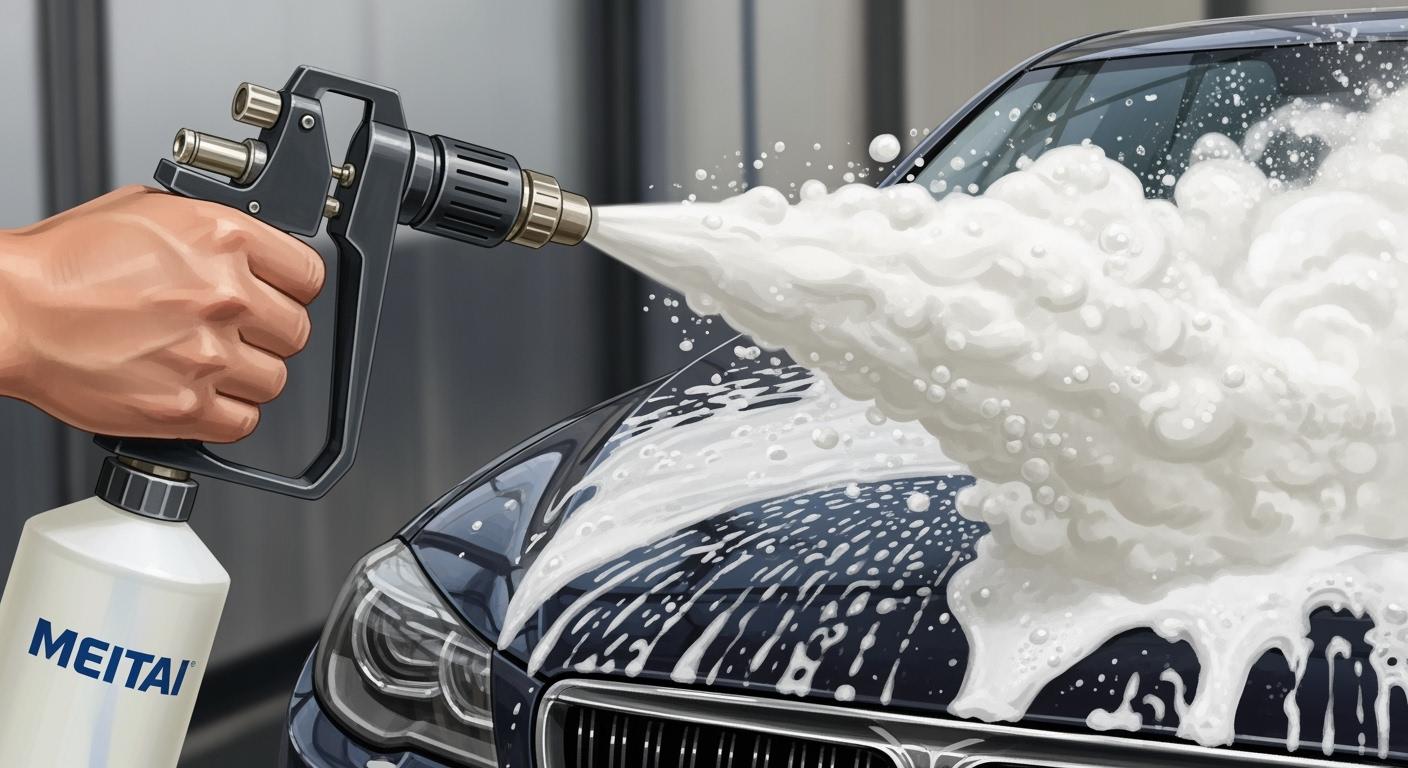
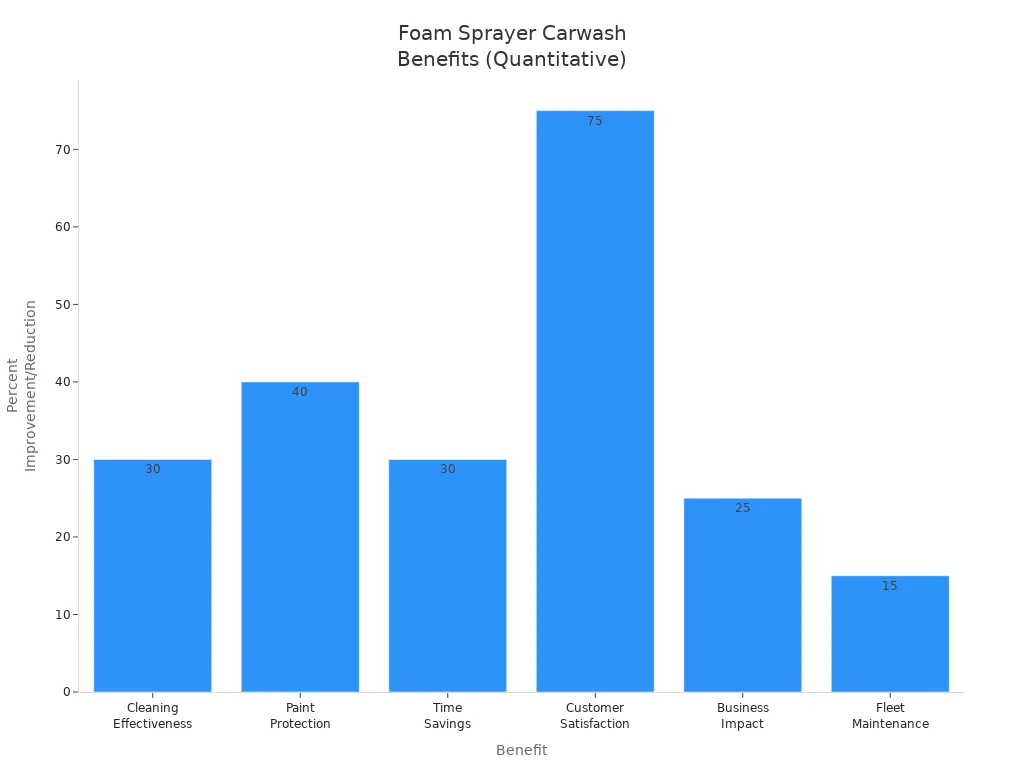
You want professional results every time you wash your car, right? Using a carwash foam sprayer makes the job easier and safer. Start by getting the soap-to-water ratio right, then pre-soak your car to loosen dirt. Apply foam evenly across the surface. Most users—about 75%—say foam cleaning helps keep their paint looking fresh and spotless. Watch out for mistakes like skipping the pre-wash, spraying foam in direct sunlight, or ignoring manufacturer instructions. If you learn how to use a foam cannon correctly, you’ll see a big difference in your wash routine.
Key Takeaways
Use the right soap-to-water ratio for thick foam. A 1:3 ratio works best for rich suds.
Always pre-soak your car with snow foam. This step loosens dirt and reduces the risk of scratches.
Apply foam evenly from top to bottom. This ensures complete coverage and effective cleaning.
Let the foam dwell for 3–5 minutes before rinsing. This maximizes cleaning power without scrubbing.
Clean your foam sprayer after each use. This keeps it functioning well and prevents clogs.
What Is a Carwash Foam Sprayer?
A carwash foam sprayer helps you cover your car with a thick layer of snow foam. This tool makes cleaning your car easier and safer. You can choose from different types, like a hand pump sprayer, a foam gun, or a foam cannon. Each one gives you a different level of snow foam and cleaning power.
Tool Type |
Description |
Key Features |
|---|---|---|
Hand Pump Foam Sprayer |
Lets you spray snow foam by hand. Good for small jobs. |
Portable, simple, budget-friendly |
Foam Gun |
Connects to a hose. Makes a decent amount of snow foam. |
Easy to use, great for quick cleaning |
Foam Cannon |
Needs a pressure washer. Blasts thick snow foam for deep cleaning. |
Best for heavy dirt, gives pro-level results |
Features and Benefits
You get many benefits when you use a carwash foam sprayer. Here are some reasons why people love using snow foam:
Snow foam covers your car and lifts dirt away from the paint.
The thick layer of snow foam helps loosen grime, so you do not have to scrub hard.
Foam cannon tools make snow foam even thicker, which means less risk of scratching your car.
You save time because snow foam covers large areas fast.
Snow foam adds extra lubrication, so your wash mitt glides smoothly.
Tip: Always use a foam cannon if you want the thickest snow foam and the best clean.
Why Use a Foam Sprayer?
You might wonder why you should use a foam sprayer instead of just washing by hand. Here are some reasons:
Snow foam from a foam cannon sticks to dirt and makes it easy to rinse away.
You lower the chance of getting scratches because snow foam lifts dirt before you touch the paint.
Foam cannons save you up to 30% of your time compared to regular washing.
Snow foam helps you use less water and soap.
Many people say foam cannons give their cars a professional, spotless look.
When you use a foam cannon, you get a thick blanket of snow foam that soaks the car. This snow foam loosens dirt and makes washing safer. You will notice your car looks cleaner and shinier after every wash. Snow foam is the secret to a great car wash, and a foam cannon makes it easy for anyone to get pro results at home.
Preparation and Setup
Tools and Products Checklist
Before you start, gather everything you need for a smooth car wash. You want to make sure you have the right tools and products ready. Here’s a quick checklist:
Meitai foam cannon
Pressure washer with a 1/4" quick connect
High-quality car wash soap or high-quality car shampoo
Clean water (warm water works best)
Microfiber wash mitt and drying towels
Bucket (for rinsing your mitt)
When you pick a car wash shampoo, go for pH-neutral formulas. These protect your paint and wax. High-lubricity soaps help your wash mitt glide over the surface. You also want a soap that creates thick foam. This lifts dirt and keeps swirl marks away.
Mixing Soap and Water
Getting the right soap-to-water ratio is key for thicker foam. If you use too much soap, you waste product. Too little, and you won’t get enough foam. Here’s a handy table to help you mix the perfect solution:
Source |
Soap-to-Water Ratio |
Description |
|---|---|---|
How a Hose Foam Cannon Makes Car Washing Easier at Home |
1:3 |
Fill the reservoir about three-quarters with water and one-quarter with soap for a rich soap solution. |
How to Use a Quick Connect Foam Cannon with Your Pressure Washer |
6-7 ounces of soap with warm water |
Recommended for the best foam cannon wash. |
How to Use Foam Spray for Car Cleaning Effectively |
1:16 |
Works well for most cars, adjustable based on dirtiness. |
You can start with 2–4 ounces of car wash shampoo in your foam cannon bottle. Fill the rest with warm water. Shake gently to mix. Adjust the amount of soap if you want more or less foam.
Tip: Warm water helps your foam cannon make thicker foam. Always mix before you attach the bottle.
Attaching to Pressure Washer
Now you’re ready to hook up your foam cannon. Follow these steps for a secure fit and the best foam:
Turn off your pressure washer before you attach anything.
Use the 1/4" quick connect system. Pull back the collar on the female fitting, snap it onto the male plug on your foam cannon, and let go until you hear a click.
Check that the connection feels tight. This keeps your foam cannon from popping off during use.
Fill your foam cannon with your soap solution.
Shake the bottle gently to mix the soap and water.
A good connection means you get thick, even foam every time. If you want pro results, always double-check your setup before you start spraying.
How to Use a Carwash Foam Sprayer

Pre-Soaking the Vehicle
You want to start every wash with a good pre-soak. This step helps loosen dirt and grime before you touch the paint. When you use a carwash foam sprayer, you cover your car in snow foam. The thick layer of foam sticks to the surface and begins to break down road film. You get deeper cleaning and less risk of scratches.
Here’s why pre-soaking with snow foam works better than just rinsing:
Method |
Effectiveness |
|---|---|
Rinsing Only |
Removes loose dust and light dirt; leaves bonded grime, risks swirl marks during contact |
Loosens and lubricates dirt; safer and more effective cleaning, removes up to 90% of dirt before contact wash |
Let the snow foam sit for 3–5 minutes. This dwell time gives the foam a chance to loosen dirt and grime. If your car is extra dirty, let the snow foam dwell a bit longer, but don’t let it dry out. You want maximum suds for the best cleaning power.
Tip: Always pre-soak your car in the shade. This keeps the snow foam from drying too fast and helps you get professional results.
Foam Application Steps
Now you’re ready to apply foam. You want to know how to use a foam cannon for even coverage. Follow these steps for the best results:
Prepare your carwash foam sprayer. Fill the tank with water and the right amount of car wash soap and snow foam. Pump the handle if needed to build pressure.
Attach your foam cannon to the pressure washer. Make sure everything feels secure.
Adjust the foam density dial based on how dirty your car is. For heavy dirt, add 1–3 ounces of Citrus Wash & Gloss to get maximum suds and deeper cleaning.
Use the 65° fan nozzle to apply foam. Spray a thick layer of foam from top to bottom. Cover every inch of your car with snow foam. This helps you apply thick foam and reach all surfaces.
If the snow foam starts to dry, reapply foam to keep the surface wet.
You want to apply foam evenly. This step gives you the cleaning power you need for a spotless finish. The snow foam lifts dirt and makes it easy to rinse away.
Dwell Time and Rinsing
After you apply foam, let it dwell for 3–5 minutes. This time lets the snow foam loosen dirt and grime. You get deeper cleaning without scrubbing hard. Don’t let the snow foam dry on your car. If it starts to dry, spray more foam.
When you rinse, work panel by panel. Use a pressure washer or sprayer to rinse off the snow foam and dirt. Rinse from top to bottom for the best results. Always use high-foaming soap for extra lubrication and longer dwell time.
Note: Rinse each section thoroughly. Dry with a large towel right away to prevent water spots. Finish with a ceramic spray if you want to reduce future spotting.
Washing and Drying
After rinsing, you can wash your car with or without a mitt. Many people ask how to use a foam cannon for contact washing. Here’s a quick look at the pros and cons:
Feature |
Wash Mitt Disadvantages |
|
|---|---|---|
Material |
Soft fibers trap dirt away from the car's finish. |
Needs regular cleaning to stay effective. |
Water and Soap Capacity |
Holds more water and shampoo for faster cleaning. |
Worn-out mitts can leave lint or lose softness. |
Control |
Fits over the hand for better grip and control. |
Higher upfront cost compared to sponges. |
Maneuverability |
Easy to maneuver for cleaning curves and corners. |
Can wear out over time. |
Risk of Damage |
Less risk of scratching due to dirt trapping. |
|
Sponge Drawbacks |
Sponges can scratch the car due to dirt on the surface. |
Sponges wear out faster and may need frequent replacing. |
Pressure Distribution |
Wash mitts spread pressure evenly, reducing damage risk. |
Sponges do not spread pressure evenly, risking damage. |
If you use a mitt, dip it in clean water often. This keeps dirt off your car’s paint. If you skip the mitt, let the snow foam do most of the work. You still get great cleaning power from the foam cannon.
Drying is the last step. Use a microfiber towel like the Massive Drying Towel or Gauntlet Drying Towels. These towels soak up water fast and leave no streaks. Blot or glide the towel over the surface. Never scrub. Dry your car in the shade or after rinsing with deionized water. Microfiber towels protect your paint and prevent swirl marks.
Tip: The twist-loop hybrid design and ButterSoft suede border on premium towels give you a streak-free, scratch-free finish. Microfiber is safe for car paint and helps you avoid water spots.
When you follow these steps, you get maximum suds, deeper cleaning, and a shiny finish. You know how to use a foam cannon for the best results. Your car will look spotless every time you wash your car with a carwash foam sprayer and snow foam.
Common Mistakes and Troubleshooting
Mistakes to Avoid
You want your car to look its best, but small mistakes can ruin your wash. Here are some things you should watch out for:
Skipping the pre-rinse can leave grit on your car’s paint. This grit causes scratches when you wash.
Not letting the foam dwell long enough means dirt stays stuck to your car.
Letting foam dry on your car leads to streaks or marks. These can damage the finish and make cleaning harder.
Using the wrong soap-to-water ratio makes cleaning less effective. Too much soap can cause streaks. Too little soap means you won’t get enough foam.
Overusing cleaning products can make rinsing tough and leave residue on your car.
Ignoring the manufacturer’s instructions can lead to problems. Each foam sprayer and soap has its own guidelines.
Tip: Always wash your car in the shade. This keeps foam from drying too fast and helps you avoid streaks.
Foam Cannon Issues
Sometimes your foam sprayer doesn’t work the way you want. Here’s how you can fix common problems:
If you see watery or thin foam, check your soap quality and dilution ratio. Clean the orifice to remove clogs.
If your foam cannon leaks, inspect the threads and seals. Don’t over-tighten the connections.
No foam coming out? Make sure the soap knob is open and the siphon tube is connected.
If the spray pattern pulses, check your water flow and tighten all connections.
Uneven foam spray usually means the nozzle is dirty or blocked. Clean it well.
Foam slides off your car too quickly? Use a high-foam soap and adjust your water ratio.
If the bottle keeps falling off, align the threads and replace the O-ring if needed.
Foam knob spins too easily? Clean and lubricate the knob threads.
Siphon tube not drawing soap? Check for blockages and make sure it’s connected right.
Here’s a quick table to help you spot and fix issues:
Problem |
Cause |
Solution |
|---|---|---|
Inadequate foam mixing |
Wrong temperature, clogs |
Stop spraying, clean filters, test spray |
Adverse application conditions |
Spraying in hot spaces |
Wash in a cool area, adjust set time |
Foam odor or off-gassing |
Soap contamination |
Ventilate, seal or remove foam |
Shrinkage or cracking |
Off-ratio foam, heat |
Cut out bad foam, respray with correct mix |
Note: Clean your foam sprayer after every use. Rinse all parts, check seals, and store it in a cool, dry place. This keeps your car looking great and your foam cannon working like new.
You want to clean your car like a pro, right? Just follow these steps:
Pre-rinse your car to remove loose dirt.
Mix and spray snow foam for thick coverage.
Let the foam dwell for a few minutes, then rinse.
Check out how foam sprayers make a difference:
Benefit |
How Foam Sprayers Help |
|---|---|
Cleaning Effectiveness |
Up to 30% less dirt sticks to paint |
Paint Protection |
40% fewer micro-scratches |
Time Savings |
Wash up to 30% faster |
Keep your foam sprayer clean and maintained. You’ll spend less time scrubbing and more time enjoying a spotless ride. Foam sprayers give you a gentle wash, help prevent scratches, and save time every session.
FAQ
How often should you clean your foam sprayer?
You should clean your foam sprayer after every use. Rinse the bottle and nozzle with warm water. This keeps the sprayer working well and stops soap from clogging the parts.
Can you use any car wash soap in the foam cannon?
You should use soaps made for foam cannons. These soaps create thick foam and protect your car’s paint. Regular dish soap can damage the finish and won’t foam up as much.
Why does your foam look thin or watery?
Thin foam usually means you used too much water or not enough soap. Try adjusting the soap-to-water ratio. Make sure you use warm water and check for clogs in the nozzle.
Is it safe to use a foam sprayer on ceramic-coated cars?
Yes, you can use a foam sprayer on ceramic-coated cars. Foam helps lift dirt without scratching the coating. Use pH-neutral soap to keep the ceramic layer strong.
What should you do if the foam cannon leaks?
Check the seals and threads for damage. Make sure you connect everything tightly but don’t over-tighten. Replace worn O-rings if needed. A quick fix keeps your foam sprayer working like new.


