
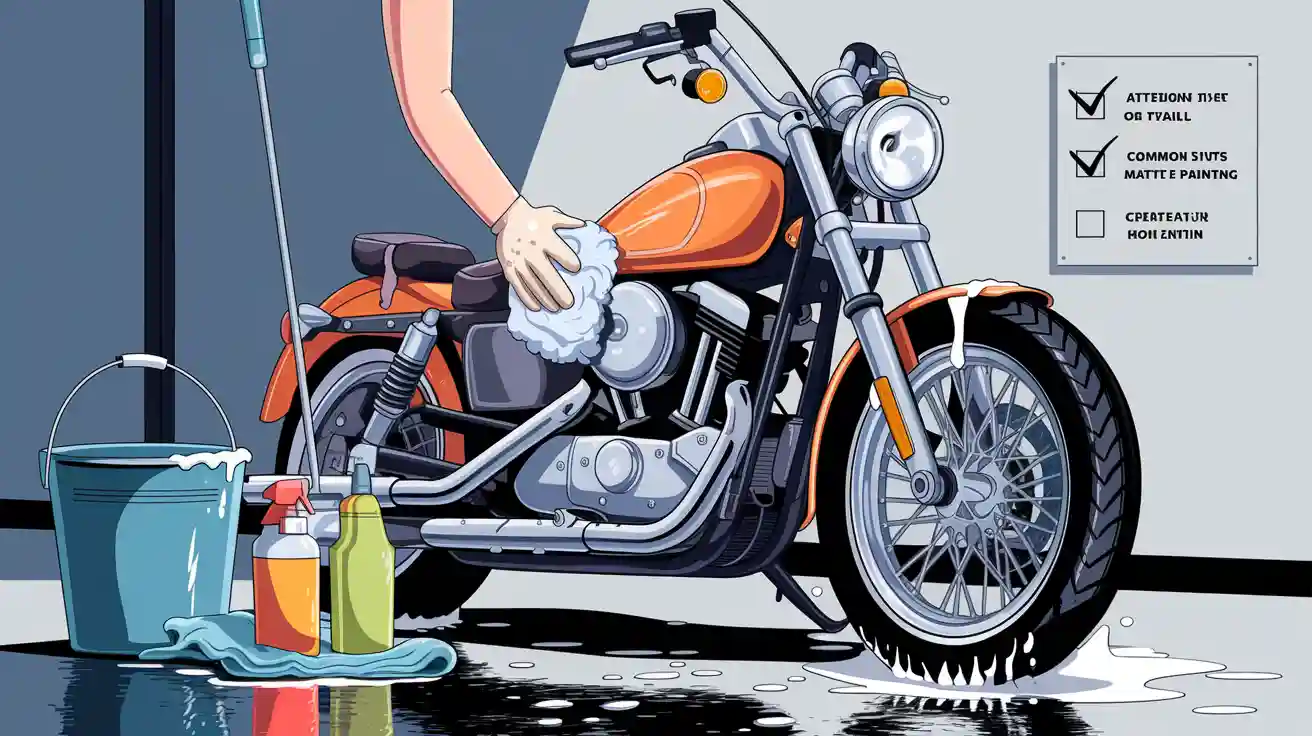
When you foam wash motorcycle, you might make some easy-to-miss mistakes. Some people wash a hot bike, use the wrong tools, or skip important steps. Others forget about drying or use too much pressure. These mistakes can leave streaks, cause scratches, or even damage parts.
Paying attention to each step makes cleaning safer and helps your bike look great. Cleaning the right way also keeps your motorcycle in top shape.
Key Takeaways
Let your motorcycle cool down before you wash it. This helps stop damage and keeps you from getting burned.
Use the right tools like a foam lance and pH-balanced cleaner. Use soft microfiber towels to protect your bike’s paint and parts.
Start with a gentle rinse to get rid of loose dirt. Then put thick foam on the bike from top to bottom. This helps lift off grime in a safe way.
Do not use high water pressure on parts like the chain and brakes. This keeps those parts from getting damaged.
Dry your bike well with microfiber towels. Lubricate the chain after washing to stop rust and help your bike run well.
Preparation
Supplies Needed
Before you start, gather everything you need for a smooth cleaning session. You want to make sure you have the right tools so you do not damage your bike or waste time. Here’s a quick checklist:
Foam lance or foam cannon
pH-balanced cleaner made for motorcycles
Two buckets (one for soapy water, one for rinsing)
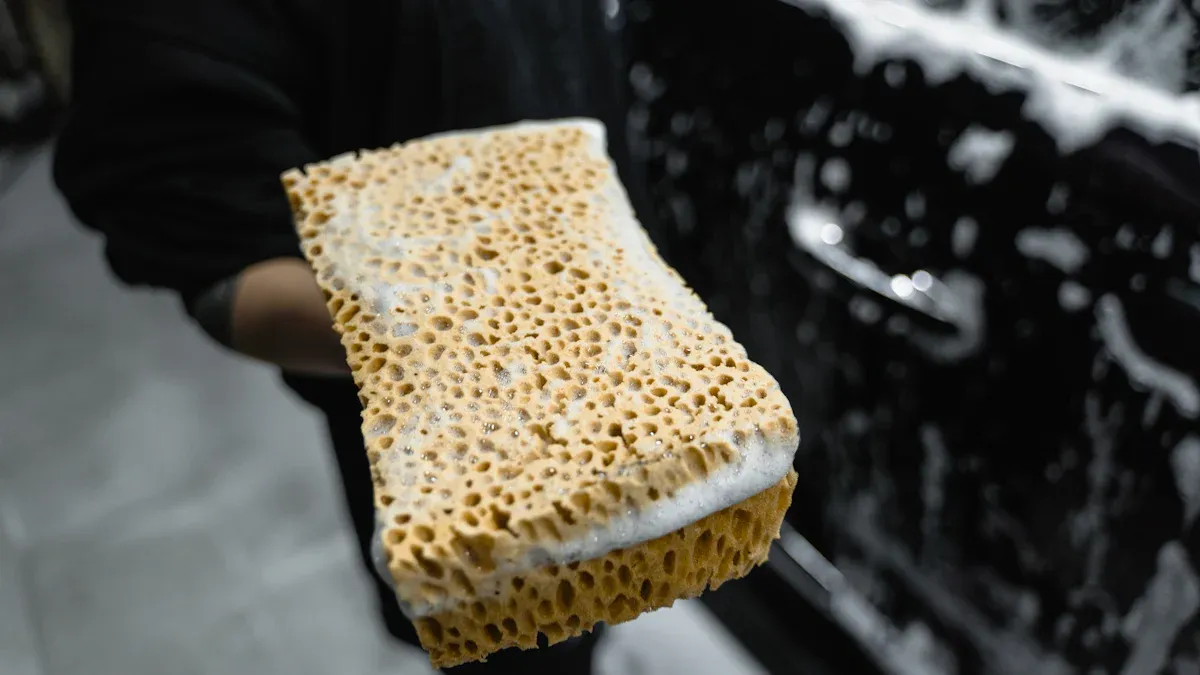
Microfiber towels and a soft wash mitt
A safe, flat area for cleaning
A foam lance or foam cannon helps you cover your bike with thick foam. This foam lifts dirt and grime, making cleaning easier and safer. A pH-balanced cleaner protects your paint and metal parts. The two-bucket method keeps dirt out of your wash mitt, so you avoid scratches. Microfiber towels are gentle and soak up water fast. Always pick a spot that is away from traffic and has good drainage.
Tip: If your bike is extra dusty, use a vacuum to remove loose dirt before you foam wash motorcycle. This step keeps grit from scratching your paint during cleaning.
Safe Setup
Safety comes first every time you wash a motorcycle. Wait until your bike cools down before you start. Hot surfaces can cause soap to dry too fast, leaving stains or streaks. You also risk burning yourself if you touch hot parts.
Set up your cleaning area in a spot where you will not slip or trip. Studies show that motorcycles have a much higher risk of serious injury compared to cars. That is why a safe setup matters. When you clean your bike in a safe place, you lower the chance of accidents. Some new safety features, like foam leg protectors, help absorb impacts and keep riders safer. Good cleaning habits and a safe setup protect both you and your motorcycle.
How to Foam Wash Motorcycle
Apply Foam
Start by making sure your motorcycle is cool and parked in a safe spot. Grab your foam lance or foam cannon and fill it with a pH-balanced cleaner. When you foam wash motorcycle, always spray from the top down. This way, the foam covers every part and pulls dirt away as it moves down. Use low pressure so you do not push dirt into small spaces or damage any parts. You want the foam to look thick and even, almost like shaving cream. This thick layer helps lift dirt and grime off the surface.
Tip: Cover all areas, but avoid spraying directly into electrical parts or open air intakes.
Let Foam Soak
Let the foam sit on your bike for a few minutes. This step is important because the foam needs time to break down and melt away thick dirt. Most experts say to wait about five to ten minutes, but do not let the foam dry out. The soaking time helps protect any wax or polish you have on your bike. If you see the foam starting to dry, it is time to rinse. During this wait, the foam does most of the hard work for you, making the next steps easier and safer for your paint.
Rinse and Wash
After soaking, rinse your motorcycle with clean water. Start at the top and work your way down. Use gentle water pressure, especially around sensitive parts like the chain, brakes, and controls. If you see stubborn spots, use a soft microfiber mitt to gently scrub them. Always dip your mitt in clean water before each pass to avoid scratching the paint. Never use high pressure on delicate areas. Rinse until all the foam and dirt are gone. This step leaves your bike looking fresh and ready for the next ride.
Remember: Good cleaning habits keep your motorcycle looking sharp and running well. Take your time and enjoy the process every time you foam wash motorcycle.
Common Mistakes
Washing a Hot Bike
Washing your motorcycle when it is hot can cause problems. Cold water on hot metal can make parts bend or break. Soap and water dry too fast on a hot bike. This leaves stains and streaks. You could burn your hands if you touch the engine or exhaust.
Tip: Let your motorcycle cool before cleaning. Park it in the shade and wait at least 30 minutes after riding. This keeps your bike safe and helps you clean better.
High Pressure on Sensitive Parts
High-pressure water might seem helpful, but it can hurt your bike. Parts like the chain, brakes, and electrical connectors can get damaged. Strong water can push into places it should not go. This can cause rust or electrical issues later.
Use low pressure when rinsing these areas. Hold the nozzle farther away and use a gentle spray. For tough dirt, use a soft microfiber mitt instead of strong water. This keeps your bike safe and all parts working well.
Skipping Pre-Rinse
If you skip the pre-rinse, you might scratch your paint. Loose dirt acts like sandpaper when you scrub or foam. Even good foam cannot lift heavy dirt if you do not rinse first.
Always start with a gentle rinse to remove loose dirt. This helps the foam work better and keeps your paint shiny. It also helps your cleaning tools last longer because they do not get clogged.
Wrong Tools or Products
Using the wrong tools or products can ruin your cleaning. Some people use old sponges, rough brushes, or harsh cleaners not made for motorcycles. These can scratch paint, dull the finish, or remove protective coatings. Household soaps can leave residue or hurt rubber and plastic.
Note: Always use a pH-balanced cleaner made for motorcycles. Use soft microfiber towels and mitts. The right tools make cleaning easier and safer.
Poor Drying or Lubrication
If you do not dry your motorcycle well, water can hide and cause rust. Skipping chain lubrication after washing can cause big problems. Rust and no oil make parts wear out faster and can break your bike.
Here’s what can happen if you skip drying or lubrication:
Aspect Affected |
Consequence of Poor Drying/Lubrication Practices |
|---|---|
Engine & Mechanical Parts |
Rust causes more friction and overheating, lowering performance. |
Chain Drive & Transmission |
Rust makes it hard to move, causing more wear and possible failure. |
Exhaust System |
Rust can make holes, lower efficiency, make loud noises, and fail emissions tests. |
Frame & Chassis |
Rust weakens the frame, making it unsafe and hard to handle; bad rust can break the frame. |
Aesthetic Appeal |
Rust makes your motorcycle look bad and less attractive to buyers. |
Trade-In/Resale Value |
Rust lowers the value and makes buyers worry about repairs. |
Maintenance Costs |
Repairs and replacing rusty parts cost more money. |
To avoid these problems, always dry your motorcycle with a clean microfiber towel after cleaning. Pay attention to hidden spots where water can stay. After you foam wash motorcycle, put oil on the chain and moving parts. This keeps your bike running well and looking good.
Pro Tips to Wash a Motorcycle
Best Rinsing and Drying
You want your motorcycle to look its best after every wash. The way you rinse and dry makes a big difference. Here are some tips to help you get a spotless finish:
Always start rinsing from the top of your bike and work your way down. Gravity helps carry dirt and soap away.
Use a soft, lint-free microfiber towel to dry your motorcycle. This keeps scratches away and soaks up water fast.
Dry your bike in a shaded, dust-free area. Sunlight can leave water spots and make soap dry too quickly.
Remove the seat if you can. Water often hides underneath, and drying this spot helps prevent rust and mold.
Try using an air dryer or air compressor for hard-to-reach places. This blows out water without touching the paint.
For a final touch, use de-ionized or distilled water for your last rinse. This helps stop water marks from forming.
Tip: Take your time with drying. Rushing can leave streaks or missed spots. A careful approach gives your bike that professional shine.
Post-Wash Care
After cleaning, you still have a few important steps. These help keep your motorcycle running smoothly and looking sharp.
Re-lubricate the chain and any moving parts. Washing removes old oil, so fresh lubrication is key for smooth rides.
Check for any water trapped in hidden spots, like under the seat or around the controls.
If you have leather or special aftermarket parts, wipe them down and protect them with the right products.
Finish by waxing or polishing the paint. This adds a layer of protection and keeps your bike looking new.
Store your motorcycle in a dry, safe place. Good storage is part of smart motorcycle maintenance and helps prevent rust or damage.
Make regular checks a habit. Detailing your bike after each wash helps you spot small issues before they become big problems.
Remember: A little extra care after washing goes a long way. You protect your investment and enjoy a better ride every time.
You now know the biggest mistakes to avoid when foam washing your motorcycle. Always let your bike cool, use the right tools, and dry it well. Stick to these steps and your motorcycle will look sharp and last longer.
Take pride in your ride! Use these safe, simple methods every time you wash your bike. You will see the difference in both shine and performance. 🏍️
FAQ
How often should you foam wash your motorcycle?
You should foam wash your motorcycle every two to four weeks. If you ride in rain or on dirty roads, wash it more often. Regular cleaning keeps your bike looking sharp and helps prevent rust.
Can you use car soap for motorcycles?
It’s best to use a pH-balanced cleaner made for motorcycles. Car soap can sometimes harm rubber or plastic parts on your bike. Stick with products designed for motorcycles to keep everything safe.
Is it safe to use a pressure washer on your bike?
You can use a pressure washer, but keep the pressure low. Hold the nozzle far from sensitive parts like the chain, brakes, and electronics. High pressure can force water into places it shouldn’t go.
What should you do if water gets into electrical parts?
If water gets into electrical parts, dry the area right away with a microfiber towel. You can also use compressed air. Check that everything works before you ride again.
Do you need to wax your motorcycle after washing?
Waxing adds a layer of protection and makes your bike shine. You don’t have to wax every time, but doing it every few washes helps protect the paint and makes cleaning easier next time.


