
You want your car to look its best, right? Using the right foam cleaner for cars techniques makes your vehicle shine and helps you keep it spotless. You do not need fancy skills or expensive tools. When you learn the basics and avoid common mistakes, you can get results that make your ride stand out.
Key Takeaways
Use foam cleaner to lift dirt gently and clean your car deeply without scratching the paint.
Always rinse your car first to remove loose dirt and prevent scratches during washing.
Mix the foam solution carefully using the right soap-to-water ratio and warm water for thick, lasting foam.
Apply foam from the top down, let it sit for a few minutes, and cover the car evenly for the best cleaning.
Clean your foam cannon or gun after each use to keep it working well and avoid damage.
Why Use Foam Cleaner for Cars
How It Works
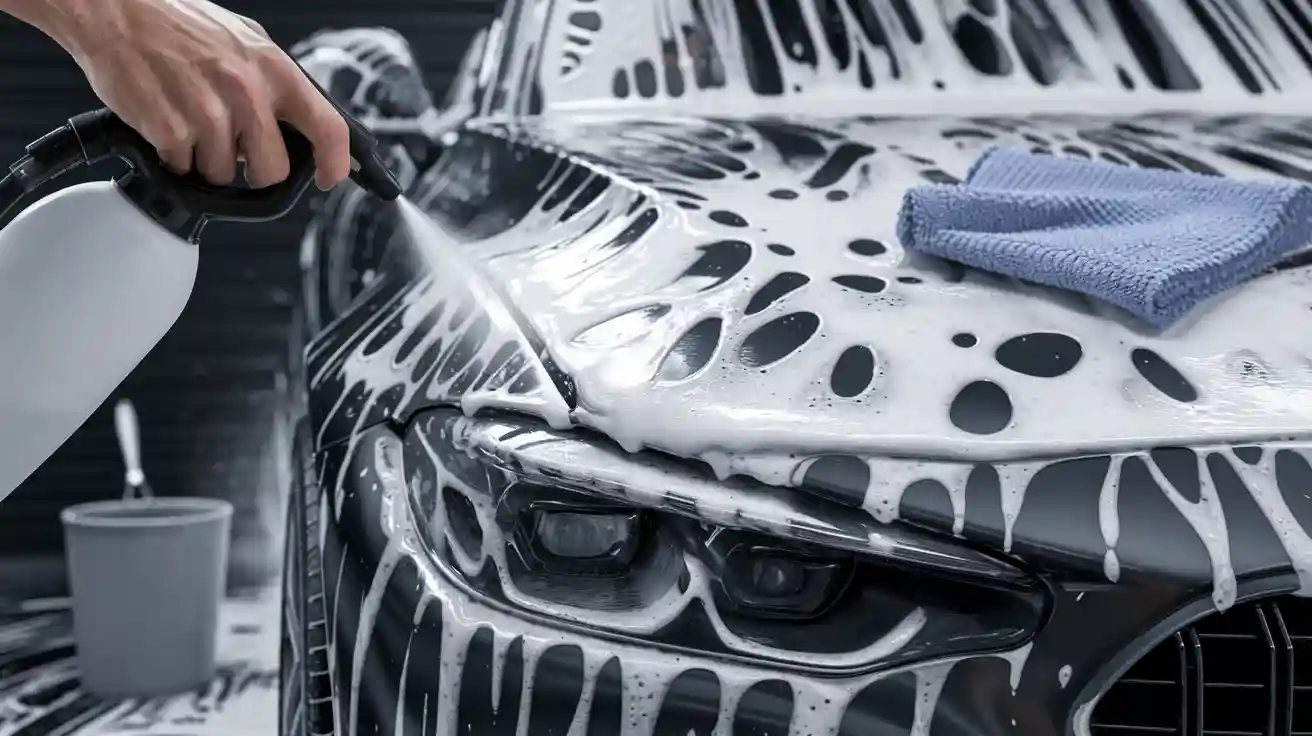
When you spray foam cleaner for cars onto your vehicle, you see thick, bubbly foam cover the surface. This foam is not just for looks. It contains special ingredients like surfactants, builders, and foaming agents. Surfactants lower the surface tension of water. They help loosen grease and dirt from your car’s paint. Builders boost the cleaning power, while foaming agents keep the bubbles stable and thick. These bubbles grab onto dirt and lift it away from the surface. The foam’s structure creates high-energy surfaces that help pull off stubborn grime. You get a deep clean without scrubbing hard or risking scratches.
Tip: Foam cleaners work both physically and chemically. The foam’s bubbles create forces that lift dirt, while the cleaning agents break down grease and stains. This combo means you can clean your car more gently and effectively.
Key Benefits
You might wonder if foam cleaning really works better than regular soap and water. Here’s what makes it stand out:
A certified lab test found that a foam cleaning system removed twice as much soil from carpet fibers as traditional liquid cleaners. The same science applies to your car’s surfaces.
Foam has a gas interface area over 100 times greater than liquid. This means more cleaning action and better dirt removal.
Foam cleaning uses less chemical, dries faster, and suspends dirt better than liquid methods.
Aspect |
Rating (out of 10) |
|---|---|
9 |
|
Ease of Use |
7 |
Durability |
7 |
Overall |
7 |
Many car owners love using foam cannons and foam cleaners. They say products like the Chemical Guys Big Mouth Foam Cannon last a long time and make washing easier. The foam lifts dirt and debris, so you avoid scratching your paint. When you rinse, you get a shiny, streak-free finish. If you want pro-level results at home, foam cleaner for cars gives you a real advantage.
Choosing Foam Cleaner and Tools
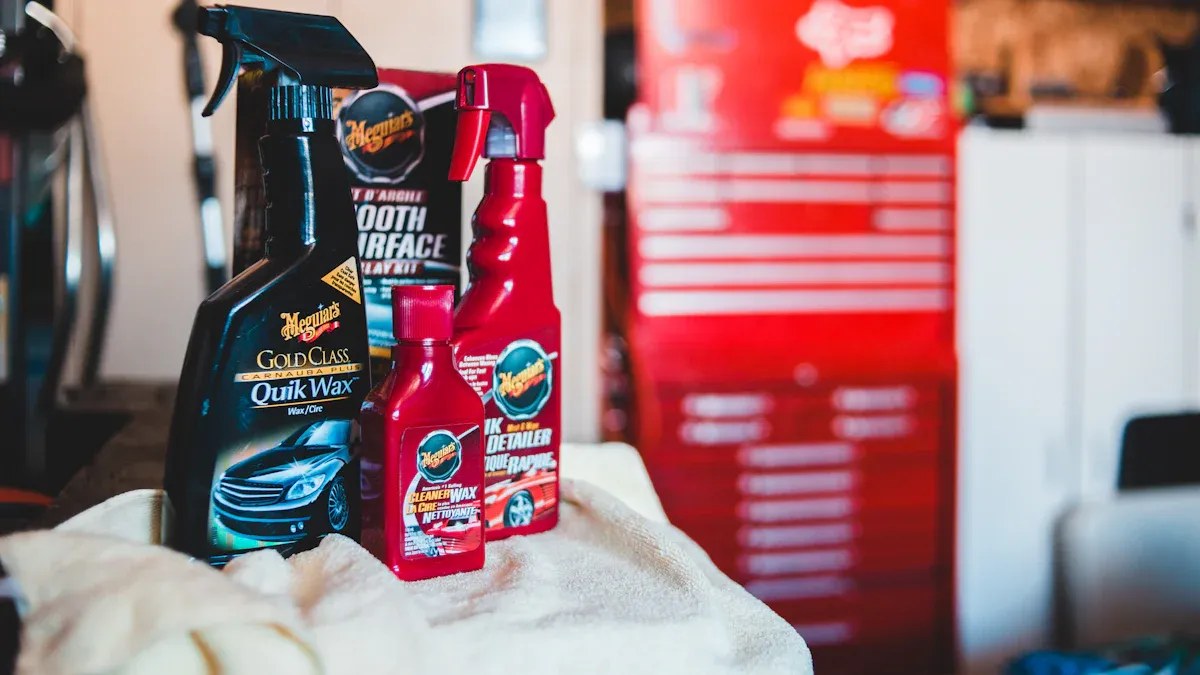
Types of Foam Cleaners
You have a lot of choices when it comes to cleaning products for your car. Foam cleaners, spray cleaners, cleaning wipes, and concentrated solutions all work in different ways. Foam cleaners stand out because they cover large areas and reach deep into stains. They use expanding bubbles to lift dirt from the surface. Spray cleaners work well for small spots. Cleaning wipes are handy but not as strong. Concentrated solutions let you adjust the strength for tough jobs.
Professional tests show that some foam cleaners remove up to 93% of stains. For example, P&S Carpet Bomber gets rid of most stains, while Koch Chemie Leather Star and Green Star also score high. The best results come when you match the cleaner to the type of stain and the material you are cleaning. Environmental factors, like temperature and humidity, can also change how well a cleaner works.
The science behind foam cleaners is interesting. Cleaning power depends on things like bubble size and how stable the foam is. Unstable foams with small bubbles often clean better. Additives such as citric acid or ethanol can make the foam work even harder by helping it grab and lift dirt.
Tip: Always check the label to see if the cleaner is safe for your car’s surfaces.
Foam Cannons and Guns
You need the right tool to get the most out of your foam cleaner. Foam cannons and foam guns are the two main options. Foam cannons connect to a pressure washer. They make thick, rich foam that sticks to your car and pulls away dirt. Foam guns attach to a regular garden hose. They are easier to use and cost less, but the foam is not as thick.
Here’s a quick look at how they compare:
Product |
Connection Type |
Ease of Use |
Foaming Ability |
Durability |
Overall Rating |
Key Notes |
|---|---|---|---|---|---|---|
MJJC Foam Cannon S (V3.0) |
Pressure Washer |
High |
Very High |
High |
5.0 |
Thick, consistent foam; easy to use; premium quality. |
Chemical Guys TORQ Foam Blaster 6 |
Garden Hose (Foam Gun) |
Moderate |
Moderate |
High |
3.3 |
Good for beginners; less foam; durable. |
Foam guns are popular with people who like to wash their cars at home. They are simple and save money. New designs let you adjust the nozzle and foam density. Still, if you want the thickest foam and best cleaning, a foam cannon with a pressure washer is the way to go.
Preparing the Foam Mixture
Getting the right foam starts with mixing your solution the right way. You do not need to be a scientist, but a few simple steps can make a big difference in how well your foam cleaner for cars works.
Dilution Ratios
Always check the label on your soap bottle. Most car wash soaps made for foam cannons suggest using 1 to 2 ounces of soap for every gallon of water. This ratio gives you thick, rich foam without wasting product. If you use too much soap, you might get sticky residue. If you use too little, the foam will look thin and weak.
Here’s a quick guide:
Soap Amount |
Water Amount |
Result |
|---|---|---|
1 oz |
1 gallon |
Light foam |
2 oz |
1 gallon |
Thick foam |
You can adjust the amount if you want more or less foam. Just remember, more soap does not always mean better cleaning. Stick with the recommended range for the best results.
Tip: Use soap designed for foam cannons or foam guns. Regular dish soap or household cleaners can damage your car’s finish and do not create the same thick foam.
Water Temperature
Water temperature matters more than you might think. Warm water helps the soap dissolve faster and makes the foam thicker. You do not need boiling water. Hot water can damage your equipment and might even hurt your hands. Aim for water that feels warm to the touch, like what you use for washing dishes. Cold water works, but you will see less foam and slower cleaning.
If you want the best foam, fill your bottle or bucket with warm water first. Then add the soap. This order helps the soap mix evenly and prevents clumps.
Mixing Tips
How you mix your solution changes the quality of your foam. Many car care experts, like Mike Phillips, recommend filling your container with water first, then adding the soap. After that, use your hand to gently stir or slosh the mixture. This gentle motion helps the soap blend without making too many bubbles too soon. If you shake the bottle hard or use a stick to stir quickly, you might break up the foam and lose some cleaning power.
Gentle stirring creates a smooth, even foam that sticks to your car. It also helps the foam last longer on the surface, so it can lift away more dirt. You do not need fancy tools—just swirl the water and soap together with your hand.
Note: Never use boiling water or shake the mixture too hard. Both can ruin the foam and make your cleaning less effective.
When you follow these steps, you set yourself up for a great wash. The right mixture means your foam cleaner for cars will cover every inch of your vehicle and pull away dirt with ease.
Prepping the Car
Rinsing First
Before you grab your wash mitt or foam gun, you need to rinse your car. This step might seem simple, but it makes a huge difference. When you rinse first, you wash away loose dirt, dust, and even small rocks. If you skip this step, you risk rubbing that dirt into your paint and causing scratches.
Many car enthusiasts say that rinsing or power washing before washing helps remove heavy dirt. They notice fewer scratches and swirls on their cars when they rinse first.
One driver shared that after a long road trip, they used a pressure washer before cleaning. Their car looked great, and they saw no new scratches.
Another tip from the community: use a pressure hose to blast away mud or thick dirt before you start washing.
Tip: Always rinse your car from top to bottom. Gravity helps pull the dirt down and off your car, so you get a cleaner surface for the next steps.
Checking for Dirt
After rinsing, take a close look at your car. Walk around and check for any spots you might have missed. Look for sticky bugs, bird droppings, or stubborn mud. If you see anything left, give those areas another quick rinse.
When you inspect your car, you set yourself up for a better clean. Studies show that people spot more problems and clean better when they check for dirt first. For example, clean parts get inspected more accurately than dirty ones. In one study, clean blades had a defect detection rate of 87%, while dirty blades only reached 67%. This means you catch more issues and get a higher-quality clean when you check for dirt before washing.
Observations also show that if you leave visible dirt or stains before cleaning, your results will not be as good. Taking a few minutes to inspect your car helps you avoid missing spots and ensures a shiny finish.
Note: Proper prepping protects your paint and helps you get the best results. Experts warn that skipping prep can lead to microscratches and poor cleaning. Take your time and do it right!
Applying Foam Cleaner for Cars
Application Order
You want to get the most out of your foam cleaner for cars. Start by applying the foam from the top of your car and work your way down. This method lets gravity help you. The foam flows down, covering every part of your vehicle. You avoid missing spots, and the dirt moves away from the clean areas.
Many car care experts agree that this top-down approach gives you the best results. When you spray foam on the roof first, it drips down the windows, doors, and panels. You do not have to go back and fix missed spots. You also save time and effort.
Tip: Always foam the roof, then the hood and trunk, and finish with the sides and bumpers. This order keeps the dirtiest parts for last.
Comparative studies show that how you apply foam matters. When you use a method that creates stable foam, like gentle stirring, you get smaller bubbles and a thicker layer. This foam stays on your car longer and does not collapse quickly. Stable foam means better cleaning because it holds onto dirt and gives the cleaning agents more time to work.
Smaller bubbles in the foam mean it sticks better and lasts longer.
Stable foam keeps cleaning agents in contact with dirt, so you get a deeper clean.
Dwell Time
After you cover your car with foam, let it sit for a few minutes. This waiting period is called dwell time. It gives the foam a chance to break down dirt, grease, and road grime. You do not want to rush this step. If you rinse too soon, the foam cannot do its job.
Most car wash pros recommend letting the foam dwell for about 3 to 5 minutes. Watch the foam as it works. You will see it loosen and lift the dirt. Do not let the foam dry on your car, though. If it dries, it can leave streaks or spots.
Foam cleaners with the right dwell time clean better than liquid soaps.
Longer contact time means more dirt gets removed.
Foam volume expansion helps spread cleaning agents evenly and uses less product.
Note: If you wash your car in the sun or on a hot day, keep an eye on the foam. It can dry faster, so you may need to rinse sooner.
Even Coverage
You want every inch of your car to get the same cleaning power. Make sure you spray the foam evenly. Overlap your passes as you move the foam gun or cannon. Do not leave bare spots or thin areas. Thick, even foam traps dirt and keeps it away from your paint.
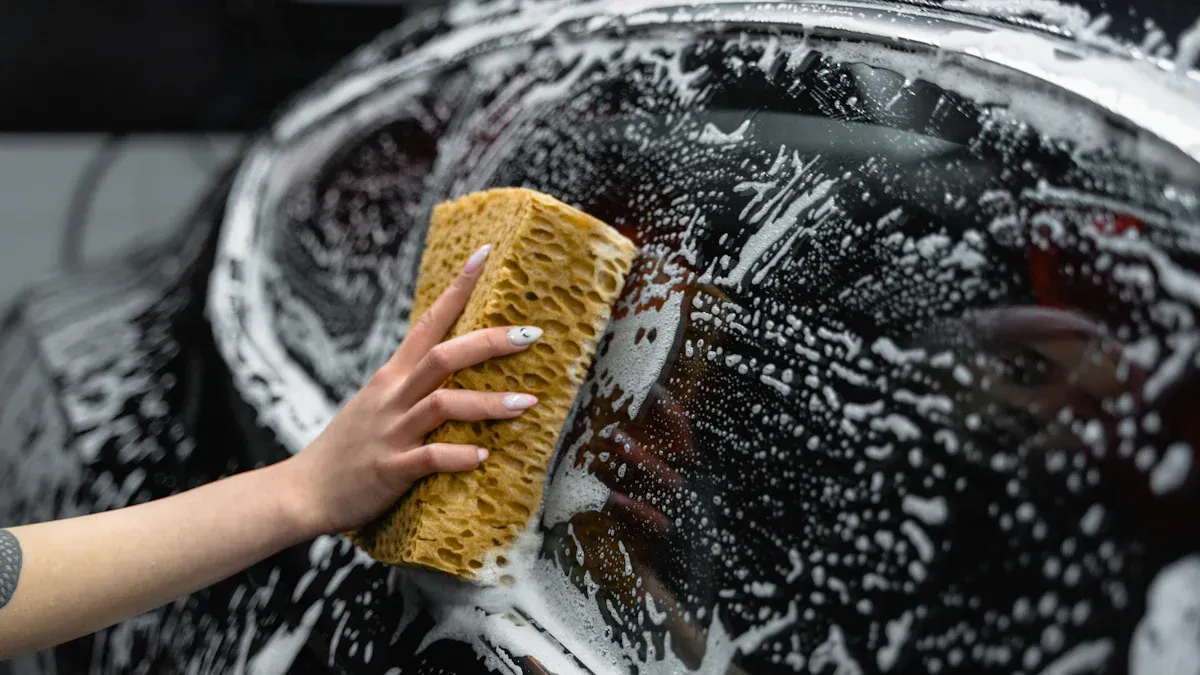
Some people think foam alone will clean their car. That is not true. Foam lifts and loosens dirt, but you still need to wash with a mitt or sponge. Foam is not a substitute for contact washing. It just makes the job easier and safer.
Foam cleaning agents spread better than liquid cleaners. They stay on the surface longer and reach into cracks and crevices.
High shear stress from spraying helps the foam clean tough spots.
Stable foam means you use less product and get better results.
Tip: Move your foam gun in slow, steady lines. Overlap each pass by about half. Check your work from different angles to spot any missed areas.
When you follow these steps, you get a cleaner car with less effort. The right application order, proper dwell time, and even coverage all work together. You protect your paint and make your car shine. Using a foam cleaner for cars the right way gives you pro-level results at home.
Washing and Rinsing
Contact Wash
Now that your car is covered in foam, it’s time for the contact wash. Grab a soft wash mitt and use the two-bucket method. One bucket holds clean, soapy water. The other bucket is for rinsing your mitt. This keeps dirt out of your clean water and helps you avoid swirl marks or scratches. Always start washing at the top of your car. Work your way down to the lower panels, then finish with the bumpers. Wheels and tires collect the most dirt, so wash them last with a separate mitt or sponge.
Tip: Move your mitt in straight lines, not circles. This helps prevent swirl marks on your paint.
Final Rinse
After you finish washing, give your car a thorough rinse. Use a hose or pressure washer to remove all the soap and loosened dirt. Start at the roof and let the water flow down. This way, dirty water won’t drip onto areas you’ve already rinsed. Make sure you rinse the wheels and tires separately. They hold onto more grime and cleaning agents.
Here’s why these steps matter:
1. Rinsing before washing removes loose dirt and debris, preventing scratches. 2. Washing with soap loosens grime and lubricates the surface. 3. The two-bucket method keeps dirt from going back on your car. 4. Always wash and rinse from the top down. 5. Rinse thoroughly to avoid streaks and residue. 6. Clean wheels and tires separately for best results. 7. Rinse wheels again to remove leftover dirt and soap. 8. Drying after rinsing stops water spots and damage.
Drying
Don’t let your car air dry. Water spots can form and ruin your hard work. Use a clean microfiber towel or a soft drying cloth. Start at the top and work your way down. Pat the surface dry instead of rubbing. This protects your paint and leaves a streak-free shine. If you want to go the extra mile, use a leaf blower or a car dryer to blow water out of crevices and mirrors.
Note: Drying right away keeps your car looking its best and helps prevent damage from minerals in the water.
Avoiding Common Mistakes
Everyone makes mistakes when washing their car, but some errors can really hurt your results. If you want a shiny, clean car, you need to watch out for these common slip-ups.
Wrong Dilution
Getting the soap-to-water ratio right is key. If you use too much soap, you might see sticky spots or streaks after rinsing. Too little soap leads to weak foam that slides off before it can clean. Always check the instructions on your soap bottle. Most car wash soaps work best with 1 to 2 ounces per gallon of water.
If you mix the solution wrong, you waste product and get poor cleaning. Take a minute to measure. Your car will thank you!
Skipping Pre-Rinse
You might feel tempted to skip rinsing and jump straight to the foam. That’s a big mistake. Rinsing first removes loose dirt, dust, and small rocks. If you skip this step, you risk scratching your paint when you wash. Some people rinse before applying foam, but if you use too much water, you can dilute the foam. This makes it run off too fast and lowers cleaning power.
Rinsing helps remove heavy dirt.
Too much water before foam can make the foam less effective.
Always rinse, but don’t soak the car right before foaming.
Letting Foam Dry
Letting the foam dry on your car is a recipe for streaks and spots. On hot days, foam bubbles can burst too soon. This means the foam won’t stick and clean as well. If the foam dries, it can leave behind soap marks that are hard to remove.
Wash your car in the shade or on a cool day. Watch the foam and rinse before it dries. This keeps your paint looking fresh and clean.
Common mistakes that lower cleaning efficiency or cause damage:
Using foam as a contact wash can scratch your paint. Foam does not have enough lubrication.
Applying foam in very hot weather makes it less effective.
Rinsing with too much water before foam can make the foam slide off too soon.
Stay alert for these mistakes. You’ll get better results and keep your car looking its best.
Equipment Care
Cleaning Foam Cannon
Taking care of your foam cannon keeps it working like new. You want every wash to go smoothly, right? Here’s a simple step-by-step guide to clean your foam cannon after each use:
Disassemble the foam cannon or spray gun so you can reach all the parts that touch the foam.
Soak any parts with heavy buildup in the solvent your manufacturer recommends. Follow the time listed in the instructions.
Use a soft brush or cloth to gently scrub away leftover foam and dirt. Avoid anything rough that could scratch the parts.
Rinse every piece with clean solvent to wash away any last bits of residue.
Let the parts air dry fully. If you have compressed air, you can use it to speed things up.
Put the foam cannon back together. Make sure all seals and connections fit tight.
Test the cannon by spraying plain water. Check for leaks or blockages.
Throw away used solvents and cleaning cloths the right way, following your local rules.
Tip: Clean your foam cannon right after you finish washing your car. This stops foam from hardening inside and keeps everything running smoothly.
Maintenance Tips
You want your equipment to last a long time. Good habits make a big difference. Here’s a table with some key maintenance tips:
Maintenance Area |
Best Practices |
|---|---|
Preventing Cross-Contamination |
Clean between uses, use dedicated tools, store and label materials, inspect for buildup. |
Cleaning Protocols |
Follow the manual, use the right solvents, clean all foam-contact parts, dry before reassembly. |
Inspection & Replacement |
Check nozzles, seals, and hoses often. Replace worn parts and test after putting it back together. |
Handling & Usage |
Handle gently, avoid drops, keep away from heat and sun, clean right after use, use quality products. |
Training |
Learn from manuals, online videos, or workshops. Stay updated on new care tips. |
Note: Regular checks and cleaning help you avoid problems. You save money and time by catching small issues before they turn into big repairs.
You can get amazing results when you use foam cleaner for cars the right way. Start with the right tools, mix your solution carefully, and always rinse before you wash. Apply foam from the top down and let it sit, but never let it dry. Keep your equipment clean and practice these steps each time. You will see a cleaner, scratch-free finish every wash. Stick with these tips and your car will always look its best!
FAQ
How often should you use foam cleaner on your car?
You can use foam cleaner every time you wash your car. Most people wash their cars once every two weeks. If your car gets dirty faster, you can use it more often.
Can you use foam cleaner without a pressure washer?
Yes, you can use a foam gun with a garden hose. The foam will not be as thick, but it still helps lift dirt. You do not need a pressure washer for basic cleaning.
Is foam cleaner safe for all car paint types?
Most foam cleaners are safe for all paint types. Always check the label before you use a new product. If your car has special coatings, test the cleaner on a small spot first.
What should you do if foam dries on your car?
If foam dries, rinse it off right away with water. Dry foam can leave spots or streaks. Try to wash your car in the shade or on a cool day to prevent this.
Can you use foam cleaner on wheels and tires?
Yes! Foam cleaner works well on wheels and tires. Spray the foam, let it sit for a few minutes, then scrub and rinse. Use a separate brush or mitt for wheels to avoid scratching your paint.


