
If you want to know how to detail a car at home, you just need the right tools, some patience, and a bit of know-how. At home car detailing saves you money, keeps your ride looking sharp, and protects its value. Here’s why it matters:
Professional detailing can boost your car’s market value by up to 15%.
80% of buyers pay more for a well-maintained vehicle.
Regular detailing prevents expensive repairs and keeps your car shining.
You don’t need to be a pro—anyone can get great results with a simple guide and quality products. Meitai offers trusted tips and supplies to help you succeed. Take your time and focus on the details for the best finish.
Key Takeaways
Get ready by checking your car. Gather good supplies. Set up your workspace in the shade. This makes detailing easier and better.
Clean the inside of your car step-by-step. First, take out trash. Next, vacuum everywhere. Clean the seats with the right cleaners. Wipe all surfaces. Clean the glass. Use deodorizer for a fresh and healthy car.
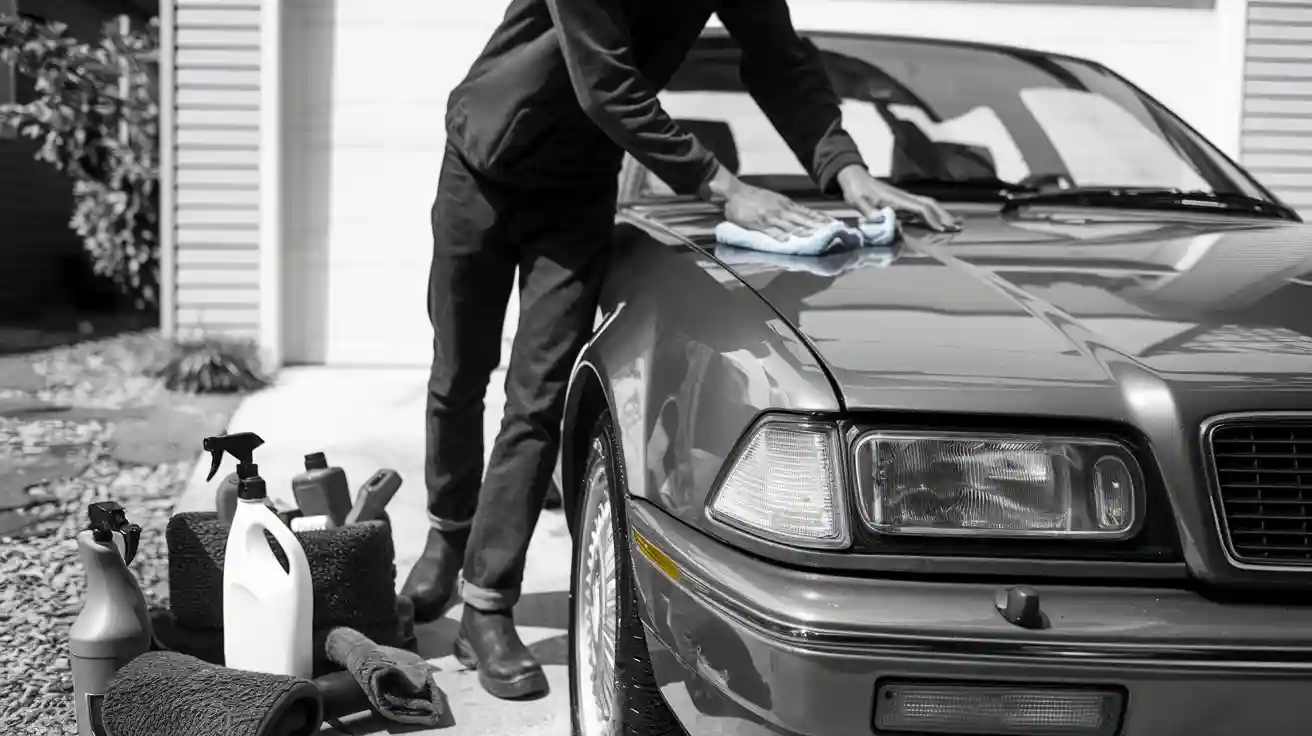
Clean the outside by starting with the wheels. Pre-wash the car. Wash it carefully. Rinse and dry it well. Then use clay, polish, and protect the paint with wax or sealant.
Be safe and gentle if you clean the engine bay. This keeps it looking nice. It also helps you spot problems early.
Take care of your car often with easy habits. Do not make mistakes like waxing a dirty or wet car. This keeps your car looking good and protects its value.
Preparation & Supplies
Inspection
Before you start, take a few minutes to check your car. This helps you spot any problems early and plan your detail. Here’s a simple checklist you can follow:
Check your tires for pressure and tread depth.
Test the battery and make sure it is secure.
Look at steering and suspension parts for leaks or damage.
Turn on all lights to see if they work.
Inspect windshield wipers and washer fluid.
Check all fluid levels, like oil and coolant.
Look at the brakes for wear.
Walk around the car and look for dents or scratches.
Peek under the hood for leaks or loose parts.
Check belts and hoses for cracks.
Look at the exhaust system for any damage.
Tip: Write down what you find. This makes it easier to remember what needs fixing later.
Supplies
You want to have everything ready before you begin. Good supplies make at home car detailing much easier. Here’s a handy table with some top-rated products and what they do:
Product Category |
Recommended Product |
Key Features & Benefits |
|---|---|---|
Multi-Purpose Cleaner |
Hertel Multi-Purpose Cleaner |
Fresh scent, eco-friendly, no residue |
All-Purpose Cleaner |
Meguiar’s VLR Cleaner & Protectant |
Cleans vinyl, leather, rubber; UV protection |
Glass Cleaner |
Invisible Glass |
Streak-free, safe on tinted windows |
Degreaser |
Simple Green |
Non-toxic, powerful on grease |
Spray Wax |
Meguiar’s Hybrid Ceramic Wax |
Easy spray, water beading, UV protection |
Wheel Cleaner |
SONAX Wheel Cleaner |
Safe on wheels, removes brake dust |
Car Detailing Vacuum |
RIDGID 15L Portable Wet/Dry Vacuum |
Strong suction, easy to use |
Car Wash Soap |
Meguiar’s Ultimate Wash & Wax |
Foamy, glossy finish, safe for all paint |
You can also find complete car cleaning kits from Meitai that include many of these items. Having the right tools saves time and gives you better results.
Workspace Setup
Pick a spot that is shaded and cool. Sunlight can dry soap and water too fast, leaving spots. Make sure you have enough room to walk around your car. Keep your supplies close by so you do not have to stop and search for things.
Note: Preparation is the secret to a pro-level detail. When you inspect, gather supplies, and set up your space, you make the whole job smoother and your car will look even better.
Interior Detailing Steps
Detailing your car’s interior can feel like a big job, but you can break it down into easy steps. If you follow the right order, you’ll get a cleaner, fresher, and healthier ride. Let’s walk through each step together.
Remove Trash
Start by taking out all the trash from your car. Look under the seats, in the door pockets, and inside the center console. Don’t forget the trunk! Removing trash first makes the rest of the job much easier. You might find old receipts, food wrappers, or even things you forgot you lost. Use a small bag or box to collect everything.
Tip: Keep a small trash bag in your car to make this step quicker next time.
Vacuum
Now grab your vacuum. Use the hose and brush attachments to reach every corner. Go over the seats, floor mats, carpets, and even the pedals. Pay extra attention to cracks and seams where crumbs and dust hide. If you have pets, use a pet hair brush or a rubber glove to lift hair before vacuuming.
A good vacuuming does more than just make your car look tidy. It removes dust, pollen, and tiny bugs that can make the air inside your car unhealthy. Regular vacuuming helps keep your upholstery and carpets in good shape for longer. Experts say that deep cleaning, including vacuuming, gets rid of allergens, bacteria, and pollutants that build up in your car. This means you and your passengers can breathe easier and enjoy a fresher ride.
Upholstery & Leather
Next, focus on your seats and any leather surfaces. Always use cleaning products made for cars, not household cleaners. Household sprays can damage leather or fabric and may leave behind sticky residue. Here’s a quick guide:
Surface Type |
What to Use |
Meitai Tip |
|---|---|---|
Cloth Seats |
Fabric cleaner and soft brush |
Test on a small spot first |
Leather Seats |
Mild leather cleaner and microfiber cloth |
Wipe dry right away |
Suede/Nubuck |
Special suede brush and cleaner |
Never soak with water |
Pick chemical-free solutions for delicate seams and piping.
Never soak leather; dry it quickly if it gets wet.
Test any new product on a hidden spot first.
Use the right tool for your seat type.
Condition leather once or twice a year to keep it soft.
Specialized cleaners protect your seats and help them last longer. They keep leather from cracking and fabric from wearing out. If you use the wrong product, you might damage the color or texture.
Surfaces
Wipe down all the hard surfaces inside your car. This includes the dashboard, door panels, cup holders, and center console. Use a microfiber cloth and a gentle cleaner made for cars. Spray the cleaner on the cloth, not directly on the surface, to avoid streaks or damage.
Don’t forget the steering wheel and gear shift. These spots collect the most germs and grime. A clean interior not only looks better but also feels better to touch. Systematic cleaning removes bacteria and dust mites, which helps keep your car’s air fresh and your surfaces looking new.
Glass & Mirrors
Clean your windows and mirrors last. Use a glass cleaner that is safe for tinted windows. Spray it on a microfiber towel and wipe in a circular motion. Make sure you get both the inside and outside of the glass. Clean mirrors and windows help you see better and make your car feel brighter.
Note: Avoid using paper towels, which can leave lint or scratch the glass.
Deodorize
Finish by deodorizing your car. Deep cleaning, like shampooing and steam cleaning, removes odors from carpets and seats. For tough smells, sprinkle baking soda on the carpets, let it sit, then vacuum it up. You can also use activated charcoal bags to absorb odors.
Deodorizing does more than just make your car smell nice. It gets rid of germs, mold, and allergens that can hide in your seats and carpets. This step helps protect your health and keeps your car feeling fresh. Many drivers say that a clean, fresh-smelling car makes every trip more enjoyable and comfortable.
Benefit Category |
Description |
|---|---|
Removes unpleasant smells from spills, food, and mildew, stopping permanent damage to upholstery. |
|
Enhanced Comfort |
Creates a fresh, relaxing space, making every drive more pleasant. |
Health and Hygiene |
Gets rid of allergens, bacteria, and mold, making the air healthier. |
Interior Preservation |
Stops odors from ruining carpets and seats. |
Resale Value & Satisfaction |
Keeps your car’s value high and makes you feel proud of your clean ride. |
Meitai Tip: Always use car-safe cleaning products and ventilate your car after cleaning to keep the air fresh.
If you want to know how to detail a car like a pro, remember that each step matters. A clean interior not only looks great but also helps you stay healthy and keeps your car in top shape.
At Home Car Detailing: Exterior Steps
Detailing the outside of your car is where you really see the shine. If you want your car to look like it just rolled out of a showroom, follow these steps for a complete exterior detailing session at home.
Wheels & Tires
Start with your wheels and tires. These areas collect the most dirt, brake dust, and road grime. Use a wheel cleaner and a stiff brush to scrub the tires and rims. Spray the cleaner on, let it sit for a minute, then scrub away the dirt. Rinse well with water.
Tip: Always clean your wheels first. If you wash them last, you might splash dirt onto clean paint.
Meitai recommends using a pH-balanced wheel cleaner that is safe for all finishes. This helps protect your wheels and keeps them looking new.
Pre-Wash
Before you grab your wash mitt, give your car a pre-wash. Spray the whole car with water or a foam cannon to loosen dirt and debris. This step helps remove loose grime so you don’t rub it into the paint during washing.
Pre-washing removes loose dirt and food, making the main wash more effective.
It also helps reduce germs and prepares the surface for a deeper clean.
Skipping this step can leave behind dirt that scratches your paint.
A good pre-wash makes the rest of your at home car detailing much easier and safer for your paint.
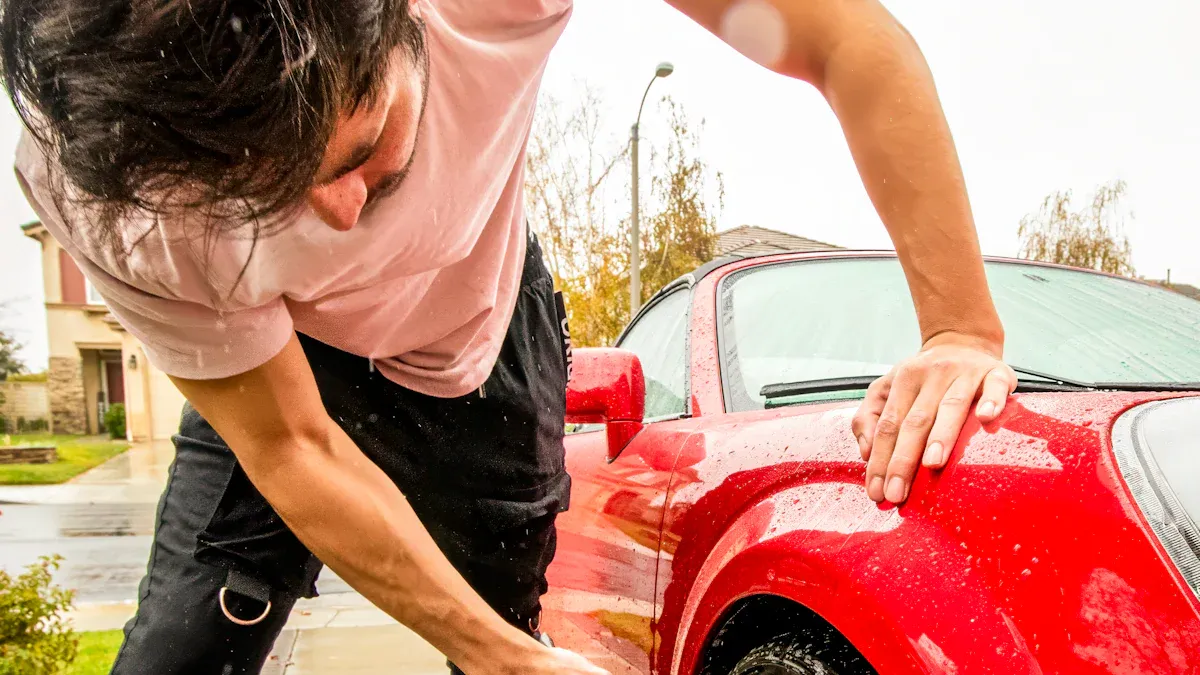
Wash
Now it’s time for the main wash. Use the two-bucket method: one bucket for soapy water, one for rinsing your mitt. Start at the top of the car and work your way down. This keeps dirt from moving to cleaner areas. Use a soft wash mitt and a gentle car soap.
Wash in straight lines, not circles, to avoid swirl marks.
Rinse your mitt often to keep it clean.
Work in small sections so soap doesn’t dry on the paint.
Meitai’s microfiber wash mitts and gentle car shampoos help you get a spotless finish without scratching.
Rinse & Dry
After washing, rinse your car well with clean water. Make sure you remove all soap and dirt. Dry your car right away using a clean microfiber towel. This stops water spots from forming and keeps your paint looking shiny.
Rinsing removes leftover dirt and minerals that cause spots.
Drying with a microfiber towel prevents water from leaving marks or etching the paint.
Avoid washing in direct sunlight, which dries water too fast and leaves spots.
Note: Use filtered or distilled water for rinsing if you can. This reduces mineral spots and keeps your paint smooth.
Proper rinsing and drying protect your paintwork and give your car a mirror-like finish.
Clay Bar
If your paint feels rough after washing, use a clay bar. Spray a clay lubricant on the paint, then gently rub the clay bar over the surface. The clay pulls out tiny bits of dirt and contaminants that washing can’t remove.
Clay bars remove bonded dirt by pulling it out of the paint.
They make your paint feel smooth and ready for polishing.
Always use plenty of lubricant to avoid scratching.
Professional detailers use clay bars to get paint surgically clean. After claying, your car will feel slick and look brighter.
Polish
Polishing is where you bring out the shine. Use a car polish and a foam applicator or machine polisher. Work in small sections, using light pressure. Polish removes swirls, oxidation, and tiny scratches, making your paint look deep and glossy.
Polishing clears away surface defects and prepares the paint for protection.
It restores shine better than basic cleaning.
Use the right pad and polish for your paint type.
Think of polishing as giving your car a facial. It goes deeper than washing and brings out the best in your paint. Meitai’s polishing kits make this step easy for beginners and pros.
Wax & Seal
After polishing, protect your hard work with wax or sealant. Wax gives your paint a deep, rich shine but lasts a few weeks. Sealants last longer—up to several months—and protect against dirt, water, and sun.
Sealants bond to the paint and create a strong barrier.
Wax adds extra gloss and depth.
Many detailers layer wax over sealant for the best of both worlds.
Glazes can boost shine but don’t protect as long as wax or sealant. For most people, a sealant is best for long-term protection, while wax is great for that show-car look. Meitai offers both options, so you can pick what works for you.
Trim & Glass
Finish your exterior detailing by cleaning the trim and glass. Use a trim restorer on faded plastic or rubber parts. Clean all windows and mirrors with a glass cleaner and a microfiber towel. This step makes your car look finished and helps you see clearly when you drive.
Meitai Tip: Avoid using household glass cleaners on your car. They can damage tint and leave streaks.
When you follow these steps, you protect your paint, boost shine, and keep your car looking its best. Each part of the process—washing, claying, polishing, and sealing—works together to give you professional results at home. With the right products and a little patience, at home car detailing can make your car stand out and stay protected for months.
Optional: Engine Bay
Cleaning your engine bay is not something you have to do every time you detail your car. Some people skip it, but if you want your car to look spotless inside and out, this step can make a big difference. A clean engine bay helps you spot leaks early and keeps your car running cooler. If you decide to try it, just follow these simple steps.
Precautions
Before you start, you need to stay safe. The engine bay has wires, sensors, and parts that do not like water. Here are some things you should do first:
Make sure the engine is cool. Never clean a hot engine.
Remove jewelry and watches. These can cause scratches or short circuits.
Cover sensitive parts with plastic bags. Focus on the battery, alternator, exposed wiring, and air intake.
Unplug the battery if you want extra safety.
Use only car-safe cleaners. Avoid harsh chemicals that can damage rubber or plastic.
Tip: Always read your car’s manual. Some cars have special instructions for cleaning the engine bay.
Cleaning
Now you are ready to clean. You do not need fancy tools. Just follow these steps:
Remove loose dirt: Use a soft brush or compressed air to sweep away leaves and dust.
Spray cleaner: Use a degreaser or engine bay cleaner. Spray it on dirty spots, but avoid soaking everything.
Scrub gently: Use a soft brush to scrub greasy areas. Focus on spots with oil or grime.
Rinse carefully: Use a gentle stream of water or a damp cloth. Do not use a pressure washer.
Dry everything: Wipe with a microfiber towel. Remove the plastic covers when done.
Shine and protect: Use a plastic or rubber protectant on hoses and covers for a fresh look.
Keeping your engine bay clean makes it easier to spot problems and keeps your car looking sharp. If you want to go the extra mile, this step is worth it!
Maintain & Pro Tips
Maintenance
Keeping your car clean between full details makes each job easier. Try these simple habits:
Shake out your floor mats every week. This stops dirt from building up.
Wipe down your dashboard and touchpoints with a microfiber cloth. You can do this while waiting in the car.
Use a small handheld vacuum for quick cleanups. Crumbs and dust add up fast.
Park in the shade or use a sunshade. This protects your interior from fading.
Rinse your car with water after rain or a dusty day. This helps prevent spots and keeps your paint smooth.
Tip: Store a small cleaning kit in your trunk. You will always be ready for spills or messes.
Common Mistakes
Many people make the same mistakes when detailing at home. These can hurt your results or even damage your car. Watch out for these:
Skipping the wash before waxing. This traps dirt and scratches your paint.
Waxing in direct sunlight. The wax dries too fast and does not stick well.
Waxing a wet car. The wax cannot bond to the paint.
Waxing before polishing. Polishing smooths the paint for better protection.
Using a dirty applicator. Old wax and dirt can scratch your car.
Choosing low-quality wax. Cheap wax does not protect or shine well.
Applying too much wax. Thick layers are hard to buff and can damage the clear coat.
Using the wrong wax for your paint. This can leave residue and make your car look dull.
Using regular cloths instead of microfiber towels. This causes scratches and uneven results.
Meitai Recommendations
Meitai makes it easy to care for your car all year. Here are some top picks:
Product |
Use Case |
Why You’ll Love It |
|---|---|---|
Microfiber Towels |
Drying, buffing, wiping |
Super soft, no scratches |
Quick Detailer |
Fast touch-ups |
Removes dust, adds shine |
Interior Cleaner |
Dash, seats, and panels |
Safe for all surfaces, fresh scent |
Tire Shine Gel |
Tires and trim |
Long-lasting, deep black finish |
Meitai’s kits help you keep your car looking great with less effort. Try their microfiber towels and quick detailer for easy, pro-level results at home.
When you detail your car at home, you protect its value and keep it looking sharp. Regular care helps you spot problems early and keeps your ride safe. Here’s what a routine can do for you:
Extend the life of your car’s parts by stopping early wear.
Boost safety by catching hazards before they grow.
Keep your car’s value high for resale.
Lower the risk of surprise repairs.
Trust Meitai for tips and products. Stick to a routine and enjoy a clean, reliable car every day.
FAQ
How often should I detail my car at home?
You should detail your car every 3 to 4 months. If you drive a lot or park outside, you might want to do it more often. Regular cleaning keeps your car looking great and protects its value.
Can I use household cleaners on my car?
No, you should not use household cleaners. These products can damage your car’s paint, leather, or plastic. Always pick cleaners made for cars. They work better and keep your car safe.
What is the two-bucket method?
The two-bucket method uses one bucket for soapy water and another for rinsing your wash mitt. This stops dirt from scratching your paint. You get a cleaner car and fewer swirl marks.
Do I need to wax my car after every wash?
You do not need to wax after every wash. Wax your car every 2 to 3 months for the best shine and protection. If water stops beading on the paint, it is time to wax again.


