

Keeping your car spotless can feel like a never-ending task, but using spray foam for cars with a reliable sprayer makes it surprisingly easy. This method doesn’t just clean—it transforms your car wash routine. The foam clings to the surface, breaking down dirt and grime with its advanced cleaning agents. Thanks to its tiny bubbles and surfactants, the foam lifts away debris without scratching your car. It’s safe, effective, and works on most car surfaces. With a foam car wash and the right sprayer, you’ll achieve professional results right at home. Plus, using a high-quality spray foam for cars saves time while giving your car that showroom shine.
Key Takeaways
Spray foam helps clean cars faster and avoids scratches. It makes your car look shiny, like it was cleaned by a pro.
Rinse your car first to wash off loose dirt. This stops scratches while cleaning.
Mix the foam properly and spray it evenly. Let it sit for a few minutes to loosen dirt before rinsing.
Tools and Materials for Using Spray Foam
Essential Equipment for a Car Wash
To start cleaning with spray foam, you’ll need some basic tools. A foam cannon or foam gun helps spread foam evenly on your car. Foam cannons work with pressure washers, while foam guns connect to garden hoses. Both work well, but foam cannons give better control and results.
You’ll also need a good car wash shampoo to mix with water. This shampoo makes thick foam that sticks to dirt and grime. Adjustable foam guns let you change the foam amount for different cleaning tasks.
Pro Tip: Make sure your tools fit your pressure washer or hose to avoid problems.
Choosing the Right Snow Foam for Car Cleaning
Not all snow foam products are the same. Some are for simple cleaning, while others are for detailed work. The best foam depends on your car’s paint and how dirty it is. Pre-rinse snow foam is popular because it loosens dirt easily and saves time.
Different foams have different thickness and cleaning strength. High-quality foams often protect your car’s paint while cleaning deeply. If unsure, try a mid-range foam first and adjust later.
Optional Accessories for Better Results
Want even better cleaning? Add some extra tools to your setup. Proportioners help mix foam and water perfectly for the right thickness. Advanced spray guns make applying foam easier and more accurate.
Here’s a simple chart of accessories and their benefits:
Accessory |
How It Helps |
|---|---|
Proportioners |
Mixes foam and water perfectly for the best results. |
Advanced Spray Guns |
Makes foam application more accurate and easier. |
Monitoring Systems |
Tracks how your tools work, making cleaning faster and better. |
These extras aren’t required but can make cleaning your car faster and more fun.
Getting Ready to Wash Your Car
Check and Rinse the Car
Before washing, look over your car carefully. Spot any tough dirt, bird droppings, or sticky spots that need extra care. Check the wheels and under the car for mud. These areas often have the most grime.
After checking, rinse the car well with water. This step clears loose dirt and stops scratches during cleaning. Use a garden hose or pressure washer for this. If using a pressure washer, keep the nozzle at least 12 inches away to protect the paint.
Tip: Focus on lower panels and wheel arches—they collect the most dirt!
Setting Up the Foam Cannon and Washer
Setting up your foam cannon and washer properly is important for thick foam. Follow this quick guide:
Equipment Needed |
What to Look For |
|---|---|
Works with electric or gas washers for thick foam. |
|
Short Pressure Washer Gun |
Easier to attach foam cannons and move while cleaning. |
High Sudsing Car Soap |
Use pH-neutral soap; mix 6-7 oz (200 mL) with warm water. |
Extension Wand |
Helps rinse and reach high spots like the roof. |
Pressure Washer |
At least 1.7 GPM; gas models often work better. |
Maintenance Tips |
Clean the foam cannon after use to avoid soap buildup. |
Securely attach the foam cannon to the washer gun. Adjust the cannon settings to control foam thickness. Use an extension wand to clean hard-to-reach areas like the roof.
Mixing the Snow Foam Solution
Mixing the snow foam correctly helps clean without harming the paint. Use these measurements for the best results:
Measurement/Ratio |
What It’s For |
|---|---|
1.5" - 2" |
Fill this much in a 1-liter bottle, then add water for deep cleaning. |
Use this amount for light dirt without removing protective coatings. |
|
2" - 2.5" |
Use this for larger cars like SUVs; fill the bottom of the bottle. |
Pour the snow foam into the bottle first, then add warm water. Shake gently to mix it well. For the best results, use pH-neutral foam to loosen dirt before washing.
Pro Tip: Always read the instructions on your snow foam to avoid using too much.
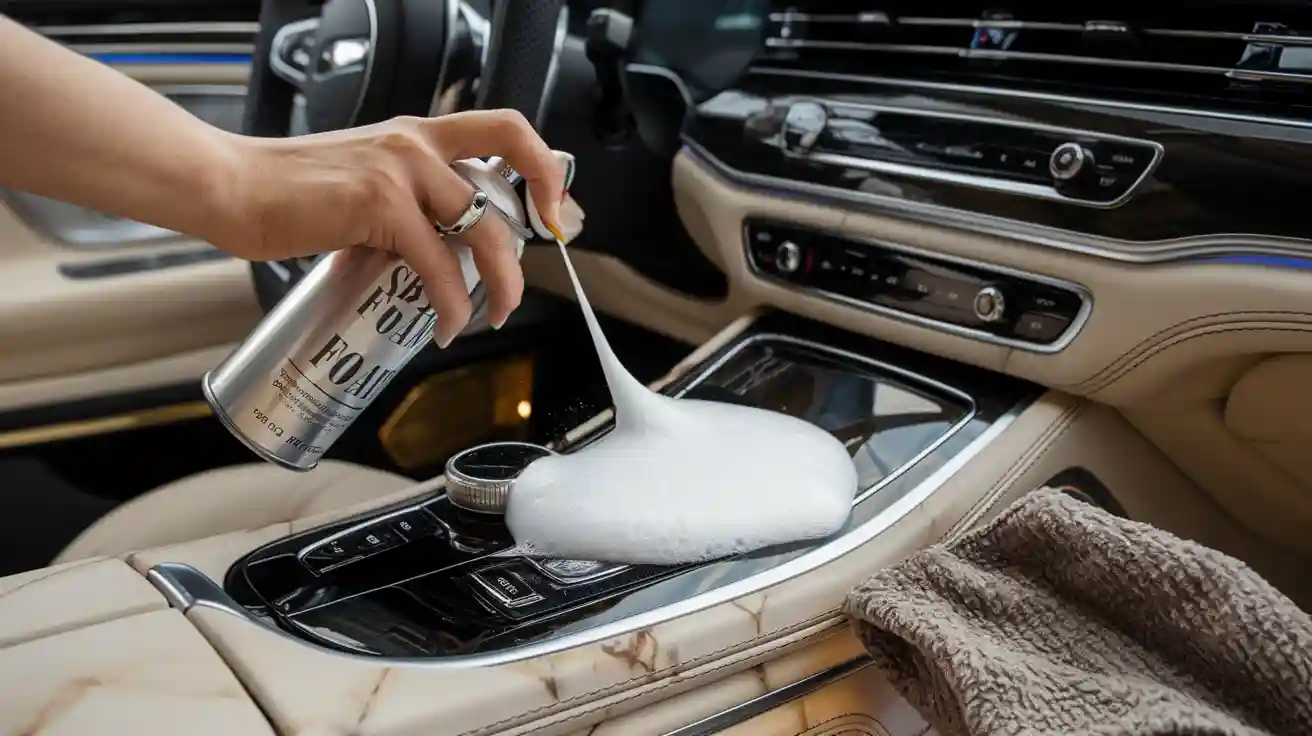
How to Apply Snow Foam

Evenly Coating the Car with Foam
When you’re ready to apply foam, aim for an even coat across your car. Start at the top and work your way down. This ensures the foam drips over every surface, covering all areas. Use a steady, sweeping motion to avoid missing spots. A thick layer of foam is key here—it clings to the dirt and starts breaking it down immediately.
If you’re using a foam cannon, adjust the nozzle to control the spray pattern. A wide fan works best for large areas like the hood and roof. For tighter spaces, like around mirrors or under door handles, switch to a narrower spray. Don’t rush this step. Take your time to apply foam evenly so every inch of your car gets covered.
Tip: Keep the foam cannon about 12-18 inches away from the car’s surface. This distance helps you get a consistent layer without wasting product.
Letting the Foam Sit to Break Down Dirt
Once you’ve coated the car, let the foam sit for a few minutes. This is where the magic happens. The cleaning agents in the foam work to loosen dirt, grime, and even stubborn bugs. A thick layer of foam ensures the dirt lifts away without scratching the paint.
Most snow foam products recommend letting the foam sit for 5-10 minutes. However, don’t let it dry on the surface, especially in direct sunlight. Dried foam can leave streaks or make rinsing harder. If you notice areas drying too quickly, lightly mist them with more foam to keep them wet.
Pro Tip: Use this waiting time to clean your wheels or prep your wash mitt. It’s a great way to multitask and save time during your snow foam car wash.
Avoiding Common Mistakes During Application
Even the best car cleaning foam won’t work well if you make common mistakes. Here’s what to watch out for:
Skipping the Pre-Rinse: Always rinse your car before applying foam. This removes loose dirt and prevents scratches.
Using Too Much Foam: More isn’t always better. Follow the mixing instructions to avoid wasting product or creating a mess.
Letting Foam Dry: Never let the foam dry on your car. Work in the shade or during cooler parts of the day to prevent this.
Ignoring Hard-to-Reach Areas: Pay attention to spots like wheel arches, under mirrors, and around emblems. These areas often collect the most grime.
By avoiding these mistakes, you’ll get the most out of your snow foam car wash. Plus, your car will look cleaner and shinier than ever.
Cleaning and Rinsing the Car
Scrubbing with a Wash Mitt or Brush
Once the foam cleaner has loosened the dirt, it’s time to scrub your car. This step ensures that stubborn grime and residue are completely removed. The best tool for this job is a microfiber wash mitt or a soft-bristled brush. These tools are gentle on your car’s paint while effectively lifting dirt.
To get the best results, follow these tips:
Use the two-bucket method. One bucket holds soapy water, and the other is for rinsing your wash mitt. This keeps dirt from transferring back onto your car.
Add grit guards to your buckets. These handy inserts trap dirt and debris at the bottom, reducing the risk of scratches.
Rinse your wash mitt frequently. After scrubbing each section, dip it into the rinse bucket to remove dirt before reloading it with foam cleaner.
For even better cleaning, consider these steps:
Use multiple microfiber wash mitts, especially for heavily soiled areas like the wheels.
Work in small sections, starting from the top and moving downward. This prevents dirt from dripping onto already-cleaned areas.
Avoid scrubbing in circular motions. Instead, use straight lines to minimize swirl marks on the paint.
Pro Tip: Microfiber wash mitts are reusable and durable, making them a cost-effective addition to your car cleaning routine.
Rinsing Off Foam Thoroughly
After scrubbing, it’s time to rinse off the foam cleaner. This step is crucial to remove all the loosened dirt and soap residue. Use a garden hose or pressure washer for this task. Start at the top of the car and work your way down, ensuring every inch is rinsed clean.
Here’s how to make rinsing more effective:
Use a wide spray nozzle for large areas like the hood and roof. Switch to a narrower spray for tight spots like around mirrors and under door handles.
Keep the nozzle at least 12 inches away from the surface to avoid damaging the paint.
Pay extra attention to areas where foam tends to collect, such as wheel arches and panel seams.
If you notice any leftover foam cleaner, go over those areas again with water. A thorough rinse ensures no residue is left behind, which could dry and leave streaks.
Tip: Rinse your car in the shade or during cooler parts of the day. Direct sunlight can cause water to evaporate too quickly, leaving behind water spots.
Drying the Car to Prevent Water Spots
Drying your car is the final step in achieving a spotless clean. Skipping this step can lead to water spots, which not only ruin the look of your car but can also damage the paint over time.
Here’s why proper drying matters:
It prevents mineral deposits from forming, which can etch into the paint.
It maintains the clarity and shine of your car’s finish.
It reduces the need for polishing or compounding, preserving the clear coat.
To dry your car effectively, use a clean microfiber towel or a dedicated car drying cloth. These materials absorb water without scratching the surface. For best results:
Start at the top and work your way down, just like during rinsing.
Use a blotting motion instead of wiping to avoid streaks.
Pay special attention to crevices, like around mirrors and door handles, where water tends to pool.
If you want to speed up the process, consider using a car dryer or a leaf blower. These tools blow water off the surface, especially from hard-to-reach areas.
Pro Tip: Drying your car immediately after rinsing not only prevents water spots but also gives you that satisfying, streak-free shine.
Optional Finishing Touches for a Professional Look
Waxing and Polishing the Car
Waxing and polishing make your car look even better. These steps protect the paint and add shine, giving it a polished finish. Pick good-quality products for the best results.
Here are some great waxes and polishes:
Menzerna 3800: Adds a super high gloss of 96.0 GU.
Meguiar's M26 Hi-Tech Yellow Wax: Starts at 95.3 GU and rises to 95.9 GU after cleaning.
Deep Crystal Wax: Buffs easily and gives the highest gloss after use.
Use a foam pad to apply wax or polish. Work on small areas using straight lines to avoid swirls. Buff with a microfiber towel for a smooth, shiny finish.
Tip: Waxing not only makes your car shiny but also protects the paint from dirt and sunlight.
Cleaning Windows and Mirrors
Clean windows and mirrors make your car look spotless. Use car glass cleaner, not household products, to avoid streaks and protect tinted windows.
Follow these easy steps:
Spray cleaner directly onto the glass.
Wipe with a damp paper towel to spread it.
Dry with a clean paper towel to remove streaks.
For mirrors, use a microfiber towel for better cleaning. Clean windows last to avoid dirt from other steps. Blue shop towels work great for a streak-free finish.
Pro Tip: Clean windows after waxing to avoid smudges and keep them shiny.
Inspecting for Missed Spots
Check your car for any spots you might have missed. Use bright lights to find dirt or streaks on the paint. Special tools like air blowers or soft brushes can help clean hidden areas.
Focus on tricky spots like door handles and emblems. These areas often hide dirt that’s hard to see.
Tip: Careful inspection ensures every detail is clean, leaving your car looking perfect.
Using spray foam to clean your car is quicker and safer. It cuts cleaning time by 30% and lowers micro-scratches by 40%. Also, 75% of car owners choose foam washes for better results.
Try it out! You’ll get a professional-level clean at home. Be sure to follow safety rules, like wearing gloves and using safe products, to protect yourself and your car.
Pro Tip: Check product labels to make sure they work with your car’s paint and finish.
FAQ
What makes spray foam better than traditional car soap?
Spray foam clings to your car's surface, breaking down dirt more effectively. It reduces the risk of scratches and simplifies the cleaning process for a spotless finish.
Can I use spray foam on any car?
Yes, spray foam works on most cars. However, always check the product label to ensure compatibility with your car's paint and finish.
How often should I clean my car with spray foam?
You can clean your car with spray foam every 1-2 weeks. Regular cleaning helps maintain its shine and protects the paint from dirt and grime.
0 comments