
You want spotless rims that look new every day. The best way to clean rims starts with the right car rim cleaner and a few simple steps. You can achieve a long-lasting shine without risking scratches or dull spots. With proper car detailing, your wheels stay protected from brake dust and road grime. Take pride in your car’s appearance and enjoy rims that always turn heads.
Key Takeaways
Clean your car rims weekly to keep them shiny, protect against damage, and maintain your vehicle's value.
Use a dedicated, non-acidic wheel cleaner that matches your rim type to remove brake dust and grime safely.
Choose the right brushes and microfiber towels to clean and dry rims without scratching or leaving spots.
Follow a step-by-step cleaning process: rinse, apply cleaner, scrub gently, rinse again, and dry thoroughly.
Apply a sealant or wax after cleaning to protect rims from dirt, brake dust, and corrosion, making future cleaning easier.
Why Wheel Cleaning Matters
Looks and Value
When you keep your rims clean, your car stands out. Shiny rims make your vehicle look newer and more attractive. People notice clean wheels right away. If you plan to sell your car, spotless rims can help you get a better price. Buyers often judge a car by its appearance, and well-maintained rims show you care about your vehicle. Regular wheel cleaning also helps protect the finish, so your rims keep their shine for years.
Tip: A quick wipe after each drive can keep brake dust from building up and make your next cleaning much easier.
Preventing Damage
Wheel cleaning does more than improve looks. It protects your rims from damage that can cost a lot to fix. Dirt, grime, and brake dust can eat away at the metal if you leave them on too long. Cleaning your rims at least once a week stops this buildup and keeps corrosion away. You also avoid problems like curb rash, rust, and cracks. These issues can weaken your wheels and even make driving unsafe.
Take a look at how regular wheel cleaning saves you money and keeps your car safe:
Aspect |
Benefit |
|---|---|
Cleaning Frequency |
Weekly cleaning prevents dirt and brake dust from causing corrosion. |
Prevention vs. Repair Costs |
Cleaning costs less than fixing damaged rims later. |
Types of Damage Prevented |
Avoids curb rash, rust, cracks, and weak spots. |
Cost of Repairs |
Small repairs cost $50-$150; big repairs can reach $500 per rim. |
Vehicle Value and Safety |
Clean wheels keep your car’s value high and your ride safe. |
Professional Detailing |
Adds shine and protects rims, so you avoid expensive repairs. |
Wheel cleaning is not just about looks. You protect your investment and avoid high repair bills. Make it a habit, and your rims will thank you.
Best Car Rim Cleaner
Choosing a Wheel Cleaner
You want the best results when cleaning your rims. Start by picking a quality wheel cleaner that matches your needs. Top brands for 2025 include Turtle Wax T-18, Meguiar's Ultimate All Wheel Cleaner, Chemical Guys Diablo Gel, Adam's Polishes, WeatherTech TechCare, TUGA, and CARPRO. These cleaning products stand out for their ability to remove brake dust and grime quickly. For example, CAR GUYS Wheel Cleaner is highly concentrated, acid-free, and safe for the environment. Meguiar’s Hot Rims Cleaner clings to vertical surfaces and dissolves grime with little effort. Mothers Foaming Wheel and Tire Cleaner works fast but needs strong water pressure to rinse.
Note: Always use a dedicated car rim cleaner. Household cleaners or acidic products can damage your wheels and tires. A non-acidic wheel cleaner protects your rims and keeps them looking new.
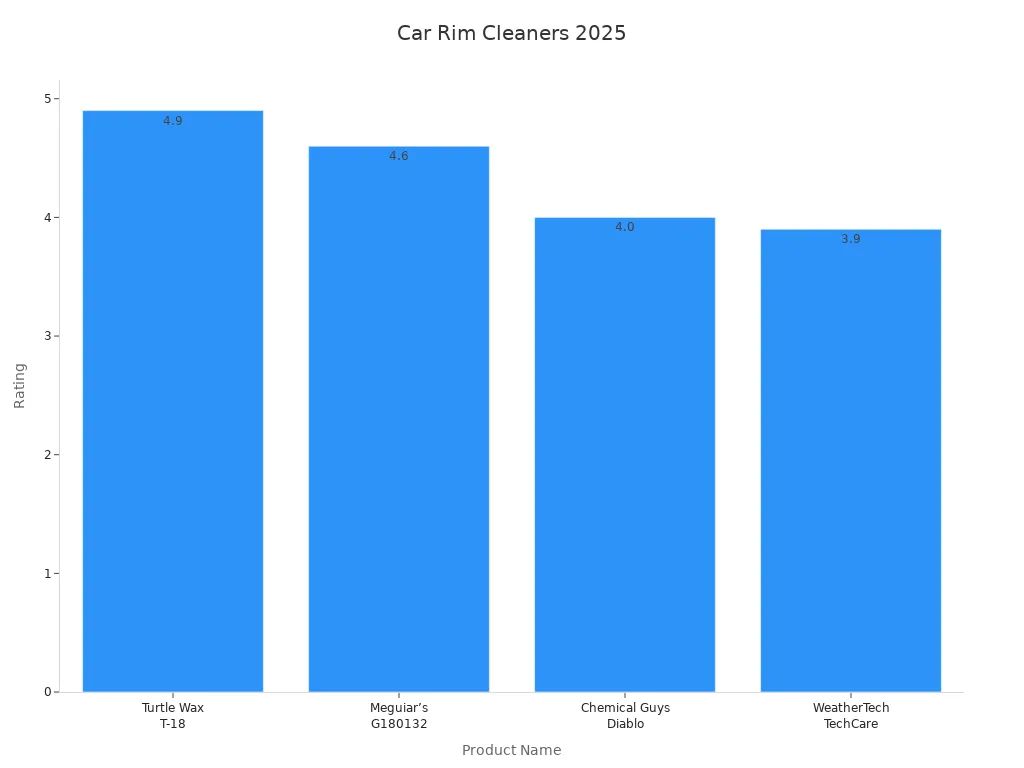
Here’s a quick look at how top wheel and tire cleaner brands perform:
Product Name |
Overall Rating |
Grime Penetration |
User Review Highlights |
|---|---|---|---|
Turtle Wax T-18 All Wheel Cleaner |
High |
Removes debris quickly; great for general cleaning. |
|
Meguiar’s Ultimate All Wheel Cleaner |
4.6 |
High |
Fast on brake dust; safe for many finishes. |
Chemical Guys Diablo Gel |
4.0 |
Moderate |
Best for chrome; eco-friendly. |
WeatherTech TechCare Wheel Cleaner |
3.9 |
3.5 |
Acid-free; less effective on thick grime. |
Consumer Reports found that even the best wheel cleaner works best with some scrubbing. Spray-on, hose-off products like Eagle One A2Z and Mothers Foaming Wheel & Tire Cleaner remove more dirt when you use a brush. Most bottles last for three to four full cleanings.
Cleaner for Rim Types
Not all wheels are the same. You need to match your cleaning solution to your rim type. Chrome, aluminum, painted, and alloy wheels each need special care. A non-acidic wheel cleaner works well for most finishes and prevents scratches or dull spots. For chrome rims, choose a wheel and tire cleaner with a dual-action formula that lifts grime and shines the metal. Aluminum wheels need a gentle, pH-balanced cleaner to avoid stains. Painted and clear-coated rims do best with a quality wheel cleaner that is safe for all finishes.
Tip: Always spot test new cleaning products on a small area before using them on the whole rim.
When you pick the right wheel and tire cleaner, you protect your investment and keep your car looking sharp. Leading solutions for 2025 offer strong cleaning power, skin safety, and environmental friendliness. Look for products that fit your driving environment and rim finish for the best results.
Wheel Cleaning Tools
Brushes and Accessories
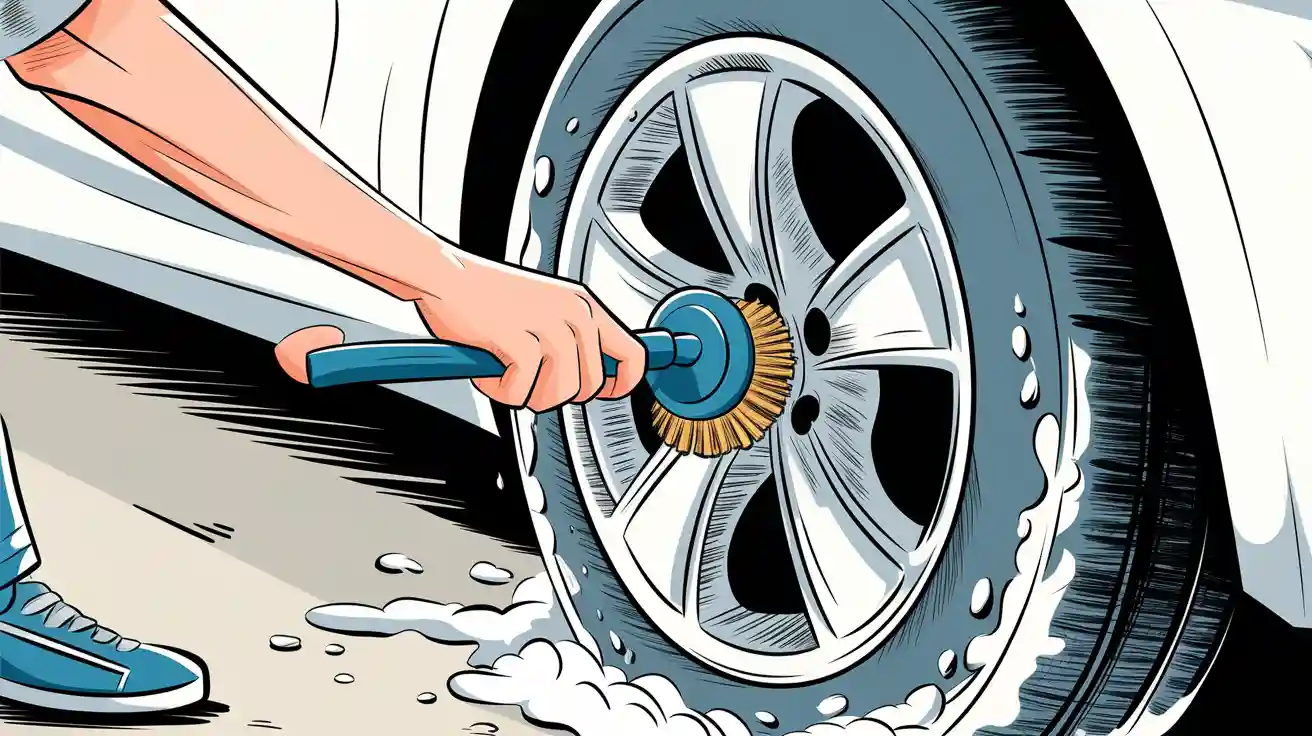
You need the right brushes and accessories to get your rims truly clean. A good brush reaches every corner of your wheels, even the tight spots behind the spokes. The Hydroshot Cleaning Brush stands out for its water-powered, soft bristle design. Its spinning head helps you clean sensitive surfaces without scratching. You can switch between cleaning tasks quickly, which saves you time. This brush works well with many WORX Hydroshot models, so you can use it for more than just your car.
When you use a wheel and tire cleaner, pair it with a brush that matches your rim type. Soft bristles work best for delicate finishes. Stiff brushes help remove stubborn grime from steel wheels. Always rinse your brush after each use. This keeps dirt from scratching your rims the next time you clean. You can also use small detailing brushes for lug nuts and tight spaces. These tools help your tire cleaner reach every part of the wheel.
Tip: Use a separate brush for your tires and rims. This prevents brake dust from scratching your wheels.
Towels and Drying Tools
Drying your rims the right way makes a big difference. If you leave water on your wheels, you may see streaks or water spots. Microfiber towels work best for drying. They absorb up to eight times their weight in water. You need fewer passes to get your rims dry. Microfiber is soft and lint-free, so it will not scratch your finish. You can wash these towels hundreds of times, but avoid using fabric softeners.
Here is a quick comparison of popular drying tools:
Aspect |
Microfiber Car Drying Towels |
Chamois |
|---|---|---|
Absorption |
Absorbs up to 8 times its weight; fewer passes needed |
Pulls water off surface; requires frequent wringing |
Ease of Use |
Simple to use; no wringing needed; gentle on paint |
Requires wringing; can dry out and stiffen; technique sensitive |
Paint Safety |
Soft, plush fibers reduce swirl marks; machine washable |
Smooth texture but can trap dirt causing scratches |
Maintenance |
Easy to wash; lasts hundreds of washes |
Needs damp storage; hand wash needed |
Cost |
More affordable |
More expensive |
When you finish using your wheel and tire cleaner, dry your rims right away. This step keeps your wheels spotless and shiny. Microfiber towels make the job easy and safe. You can also use a separate towel for your tires after using a tire cleaner. This keeps your rims free from tire dressing or leftover grime.
Wheel Cleaning Process
Keeping your rims spotless starts with a clear plan. Follow this step-by-step guide to get the best results and protect your wheels from damage. You will use the right car rim cleaner, tools, and techniques for a professional finish.
Preparation Steps
Start by gathering all your supplies. You need a wheel cleaner, iron removers, degreaser, brushes, microfiber towels, and gloves. Make sure your wheels are cool to the touch. Never clean wheels right after driving because heat can cause cleaners to dry too fast and leave stains.
Here is a simple preparation checklist:
Park your car in a shaded area.
Put on gloves and safety glasses.
Remove any loose dirt with a soft brush.
Check for deep scratches or cracks. Do not try to repair serious damage yourself.
If you plan to polish aluminum rims, use only chemical strippers to avoid bending the metal.
Mask off areas you do not want to clean, like valve stems or lug nuts.
Tip: Always work on one wheel at a time. This keeps products from drying out and makes the cleaning process more effective.
Initial Rinse
Begin the wheel cleaning process with a strong rinse. Use a hose or pressure washer to blast away loose dirt and brake dust. This first rinse helps remove most surface grime and prepares the rim for deeper cleaning action. Rinsing also lowers the risk of scratching your wheels during the next steps.
Experts recommend rinsing thoroughly to meet high standards for cleanliness. You want to remove as much residue as possible before you apply wheel cleaner. If you have hard water, consider using a rinseless wash to avoid water spots.
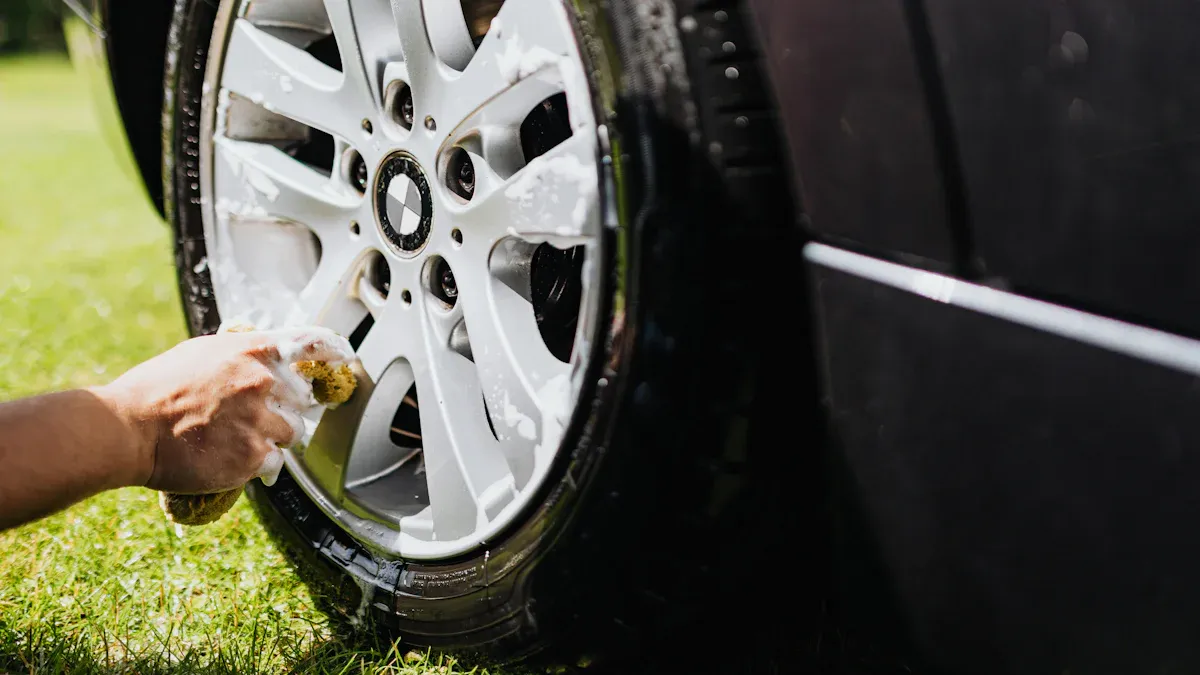
Applying Cleaner
Now you can apply wheel cleaner to the rim. Choose a product that matches your wheel type. Spray the cleaner evenly over the entire surface, including the barrel and behind the spokes. Let the cleaner sit for the time listed on the label, usually one to two minutes. This soaking time allows the cleaner to break down brake dust and stubborn grime.
For tough stains, use iron removers or a non-acidic degreaser. Iron removers react with embedded particles and turn purple as they work. Always follow safety instructions and avoid letting any product dry on the rim. If you see heavy buildup, you can use WD-40 on a cloth for spot treatment, but rinse it off right away.
Note: Never use household cleaners or acidic products. These can damage your wheels and strip away protective coatings.
Agitation and Scrubbing
After the cleaner has soaked, start scrubbing. Use a soft-bristled brush for delicate finishes and a stiffer brush for steel wheels. Focus on tight spots, like around the lug nuts and between spokes. For multi-spoke wheels, rotate the wheel halfway and clean again to reach every area.
Scrub the tires with a separate brush and tire cleaner. This step removes old dressing and road grime. For best results, use specialized brushes for brake areas and flat surfaces. Agitate the cleaner gently to avoid scratching the rim.
Tip: Use a small detailing brush for intricate designs and valve stems. This helps your cleaning action reach every part of the wheel.
Rinsing and Drying
Rinse the wheel and tire thoroughly with clean water. Make sure you remove all traces of cleaner, iron removers, and degreaser. Pay special attention to the lug nuts and wheel barrels. A pressure washer works best, but a strong hose stream also does the job.
Dry the wheel right away using a premium microfiber towel. Fold the towel for better control and wipe from top to bottom. You can also use a handheld dryer, holding it 4-6 inches away to avoid drips and scratches. Drying quickly prevents water spots and keeps your rims looking shiny.
Maintaining the right pH balance during rinsing and drying protects your wheel coatings and keeps the shine lasting longer. Always follow the manufacturer’s instructions for dilution and application.
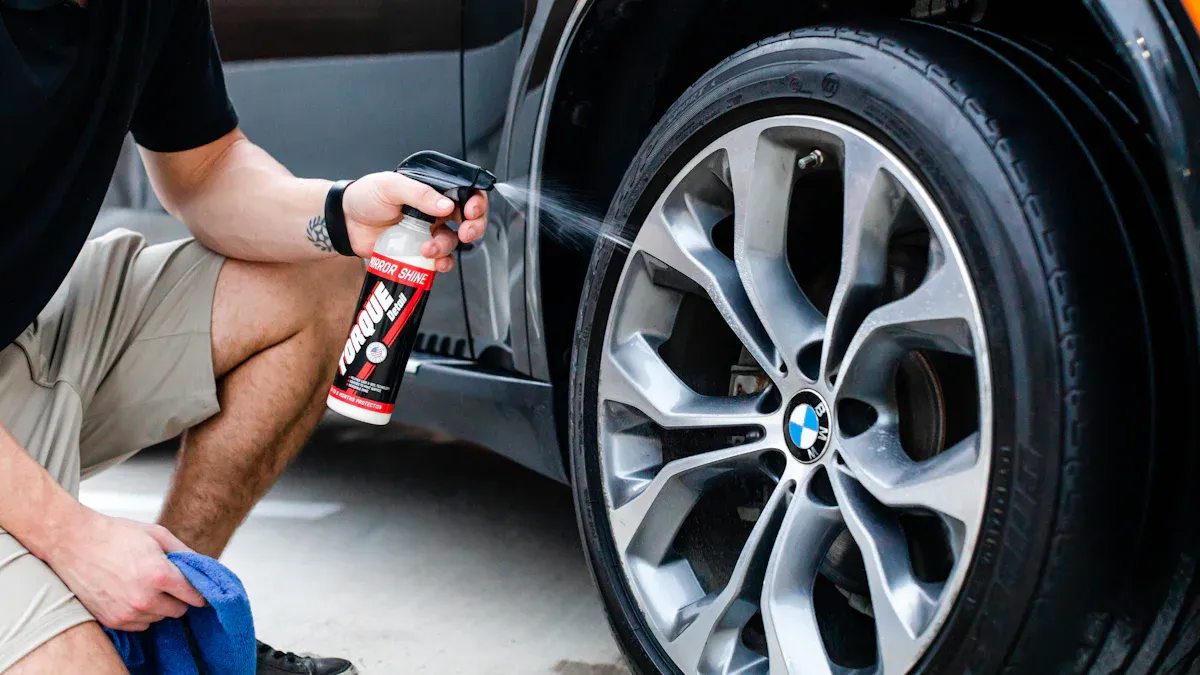
Pro Tip: Finish by applying a hydrophobic ceramic coating spray. This step repels brake dust and makes future cleaning easier.
By following this step-by-step process, you ensure your wheels stay clean, protected, and looking their best. Use this step-by-step guide every time you clean your rims for a spotless finish.
Step-by-Step Process for Stubborn Grime
Brake Dust Removal
You often see brake dust as a dark, gritty layer on your rims. This dust can cause pitting and corrosion if you leave it on your wheels. Removing brake dust keeps your rims looking sharp and protects them from damage. Start by spraying a safe wheel cleaner over the entire rim. Let the cleaner sit for a few minutes so it can break down the stubborn grime. Use a soft brush to scrub every part of the wheel, including tight spots between spokes.
Apply the cleaner with the correct settings for your wheel type.
Give the product enough dwell time to work on the dust.
Rinse with high-pressure water to wash away all residue.
Use fresh, soft water for the best results.
Modern cleaning tools, like angled brushes and precise chemical sprayers, help you reach deep areas without scratching. Routine cleaning keeps your wheels in top shape and makes future cleaning easier.
Tip: Regularly removing brake dust during your detailing routine helps your rims last longer and keeps them looking new.
Iron Remover Use
Iron particles from the road and brakes can stick to your rims and cause rust spots. Iron removers work fast to dissolve these stains. Choose a product like Iron OUT® Rust Stain Remover Powder.
Spray or apply the iron remover directly to the affected area.
Let it soak for about five minutes or until you see the stains fade.
You do not need to scrub hard; the formula lifts the iron away.
Rinse the rim well to remove all traces of the product.
Iron removers save you time and effort. They also help with decontamination, making your wheels safer and cleaner.
Deep Cleaning Tips
Sometimes, stubborn grime needs extra attention. Follow this step-by-step guide for deep cleaning:
Rinse your wheels to remove loose dirt.
Use a car wash soap made for vehicles, not household cleaners.
Wash in small sections from top to bottom.
For sticky stains like tar or sap, use a bug and tar remover.
Treat tough spots with a clay bar after washing.
Always dilute concentrated cleaners as directed.
Test new products on a hidden area first.
Dry your rims with a clean microfiber towel to prevent water spots.
Finish by applying a protective wax. This step adds shine and guards against future stubborn grime. Deep cleaning and regular decontamination keep your wheels looking their best.
Wheel Protection and Maintenance
Applying Sealant or Wax
You can keep your rims looking new by applying a sealant or wax after each wheel cleaning. These products form a barrier that shields your wheels from dirt, brake dust, and harsh weather. When you use a quality sealant, you help prevent fading and rust. Wax adds shine and makes it harder for grime to stick. After cleaning, dry your rims and then spread a thin layer of sealant or wax with a soft applicator. Let it cure as directed, then buff with a clean microfiber towel. This step not only boosts shine but also helps in preventing corrosion. Regular use of protectants and polishes extends the life of your rims and keeps them looking their best.
Tip: Always choose a sealant or wax made for car rims. These products last longer and offer better protection than regular car wax.
Regular Cleaning Routine
A regular cleaning routine is the key to comprehensive wheel care. You should wash your rims weekly to remove brake dust, salt, and road grime. This habit stops harmful buildup and keeps your wheels safe from damage. Research shows that regular cleaning removes contaminants that cause corrosion and surface wear. When you clean and protect your rims often, you avoid costly repairs and keep your car looking sharp. Use a gentle wheel cleaner and soft brushes for each wash. Dry your rims completely to avoid water spots. By sticking to a schedule, you make each cleaning session easier and faster.
Cleaning Task |
Frequency |
Benefit |
|---|---|---|
Basic Wash |
Weekly |
Removes dirt and brake dust |
Deep Clean & Protect |
Monthly |
Renews protection, prevents rust |
Quick Touch-Ups
Quick touch-ups help you maintain clean rims between deep cleans. You can use spray-on protectants during your regular car wash. These products add a layer of defense that lasts for weeks. Weekly light cleaning stops grime from building up. Monthly deep cleaning sessions keep your rims in top shape. Quick yet comprehensive cleaning routines save you time and effort. Over time, these touch-ups build stronger protection and keep your wheels looking fresh.
Weekly light washes prevent buildup.
Monthly deep cleans renew protection.
Remember: Quick touch-ups make it easy to keep your rims spotless and protected all year.
Mistakes to Avoid
Wrong Products
You might think any cleaner will work on your rims, but that is not true. Using the wrong cleaning products can cause real harm. Some cleaners, especially those with a low pH, can eat away at alloy or chrome-plated rims. When you use iron removers or harsh chemicals, they react with brake dust and metal. This reaction can speed up rust and damage your wheels. If you do not rinse these products off right away, you risk corrosion and stains. Always check the label before you spray anything on your rims. Choose cleaning products made for car wheels. Avoid household cleaners and anything too acidic.
Using the wrong cleaner can turn a shiny rim dull or even rusty. Always follow the wheel cleaning dos and don'ts to keep your wheels safe.
Environmental factors like road salt and harsh weather can also damage rims.
Brake dust builds up and creates a corrosive layer.
Scratches or chips in the rim coating let rust start.
Not cleaning often enough lets dirt and chemicals weaken your rims.
Skipping Protection
You might skip the last step and forget to protect your rims. This mistake leaves your wheels open to dirt, brake dust, and water. Without a sealant or wax, grime sticks faster and cleaning gets harder. Over time, your rims lose their shine and may start to corrode. After every wash, apply a rim sealant or wax. This simple step keeps your wheels looking new and makes future cleaning easier.
Mistake |
Result |
Solution |
|---|---|---|
No protection |
Faster dirt buildup |
Use rim sealant or wax |
No regular care |
Dull, stained wheels |
Clean and protect often |
Cleaning in Sunlight
Washing your rims in direct sunlight seems easy, but it causes problems. Sunlight heats up the metal and dries cleaning products too fast. This can leave spots, streaks, or even stains on your rims. Hot surfaces also make chemicals react faster, which can damage the finish. Always clean your wheels in the shade or when they are cool. This gives you more time to rinse and dry, so your rims stay spotless.
Tip: Early morning or late afternoon is the best time for wheel cleaning. You get better results and avoid damage from the sun.
To achieve clean wheels and a long-lasting shine, follow these essential steps:
Use dedicated cleaning agents like iron removers and degreasers to break down grime.
Scrub with stiff brushes to reach every detail.
Rinse thoroughly to remove all residue.
Dry and polish rims with microfiber towels.
Apply wax or sealant for protection.
Regular care not only keeps your wheels spotless but also protects against damage and costly repairs. Clean wheels help your car look great and perform at its best all year.
FAQ
How often should you clean your car rims?
You should clean your car rims once a week. Regular cleaning stops brake dust and grime from building up. This habit keeps your wheels looking new and helps prevent damage.
Can you use dish soap or household cleaners on rims?
Avoid using dish soap or household cleaners. These products can strip protective coatings and cause dull spots. Always choose a cleaner made for car rims to protect the finish.
What is the safest way to remove brake dust?
Spray a dedicated wheel cleaner on the rim. Let it sit for a few minutes. Use a soft brush to scrub the surface. Rinse with clean water. This method removes brake dust without scratching.
Do you need to dry rims after washing?
Yes, you need to dry your rims after washing. Use a microfiber towel to prevent water spots and streaks. Drying also helps keep your rims shiny and clean.


